Statement of intent
What is the theme?
I have picked out the theme natural texture to display my growth in photography and exhibit the unique patterns in nature. I will present a website of my work that will exemplify and illustrate my thoughts, advancements and my development through my photographs on natural texture with the skills I developed through lessons. Then once I have finished my time in GCSE photography I will choose out the foremost, leading photograph to show the enhancements I made over time.
I have picked out the theme natural texture to display my growth in photography and exhibit the unique patterns in nature. I will present a website of my work that will exemplify and illustrate my thoughts, advancements and my development through my photographs on natural texture with the skills I developed through lessons. Then once I have finished my time in GCSE photography I will choose out the foremost, leading photograph to show the enhancements I made over time.
Which artists/photographers are you going to research and why?
For my research of photographers I found one that had caught my interest who takes photographs of natures texture. The name of this photographer is Paul Mitchell. His pictures of nature really stand out to me as it is the same topic as I am learning and it is and is an inspiration to my work and I aspire for my photographs to catch people attention the same way his photographs caught my attention.
Another photographer I have decided to look into is Aaron Siskind who is a famous American photographer who is known for the texture in his photographs. The abstract work that Siskind became most well known was born from trying not only to capture the subject, but also to express one's state of mind with photographs. In the early 1940s, he began taking pictures of patterns and textures of mundane subjects such as coiled ropes, sand footprints, and algae. I aspire too eventually take similar photographs as he has done.
My third photographer that I have decided to follow is Ansel Adams. Ansel Adams rose to prominence as a photographer of the American West, particularly Yosemite National Park, using his work to promote conservation of wilderness areas. His iconic black-and-white images helped to establish photography among the fine arts. The reason I have chosen this photographer is because I am intrigued by his black and white images and I avail of his work as I have researched previous photographers who have also used these techniques of using black and white filters and I do relish this technique.
What will you do for initial research?
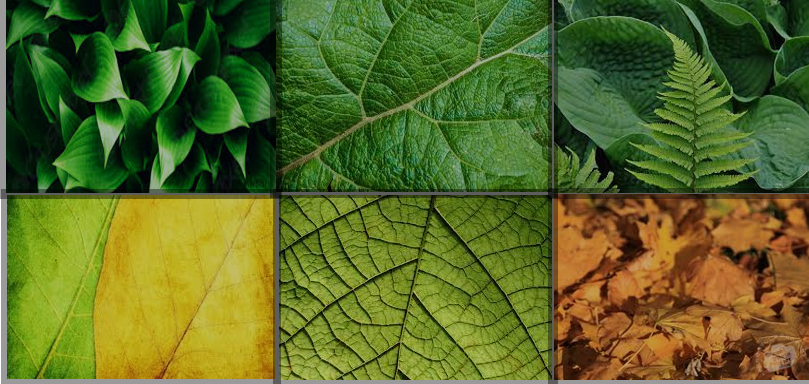
When I first decided on this concept, images of natural textures like fruit, leaves, plants, and feathers sprang to mind. After giving the project title some more thought, I realise there are a lot of directions I could take with my work, such using man-made textures, combining and contrasting various textures, and taking both studio and outdoor photos. Having a variety of textures will give me more photos to contrast and experiment with when I'm editing my work in Photoshop.
When I first decided on this concept, images of natural textures like fruit, leaves, plants, and feathers sprang to mind. After giving the project title some more thought, I realise there are a lot of directions I could take with my work, such using man-made textures, combining and contrasting various textures, and taking both studio and outdoor photos. Having a variety of textures will give me more photos to contrast and experiment with when I'm editing my work in Photoshop.
What photoshoots do you intend to complete?
I hope to take some pictures and images of some texture pictures that show great detail of the texture, I would bring the camera up-close to the object I think food and vegetables will be the best option for this as it has a lot of detail and texture in them so I would like to capture a few galleries of those and use different types of lighting so I can capture the defined details in the objects. As I had mentioned in the previous paragraph I will also separate my work into man made texture and natural texture to see how different they are to each other.
I hope to take some pictures and images of some texture pictures that show great detail of the texture, I would bring the camera up-close to the object I think food and vegetables will be the best option for this as it has a lot of detail and texture in them so I would like to capture a few galleries of those and use different types of lighting so I can capture the defined details in the objects. As I had mentioned in the previous paragraph I will also separate my work into man made texture and natural texture to see how different they are to each other.
How are you going to experiment?
I'll start by photographing the produce, leaves, and plants I can bring to school to demonstrate my work's progression. Then, using more inspiration from these photographs, I will further improve them by modifying them in Photoshop. Then, I intend to leave Manchester/Stretford and collect texture images from my surroundings. For this project, like to go into town or to go into a park and capture the rivers trees and other natural texture around in the area. I already have a tone of thoughts racing through my head, which will help me move in the proper direction.
I'll start by photographing the produce, leaves, and plants I can bring to school to demonstrate my work's progression. Then, using more inspiration from these photographs, I will further improve them by modifying them in Photoshop. Then, I intend to leave Manchester/Stretford and collect texture images from my surroundings. For this project, like to go into town or to go into a park and capture the rivers trees and other natural texture around in the area. I already have a tone of thoughts racing through my head, which will help me move in the proper direction.
How will you show progress?
I will show my progress by producing a website of all my photographs to show the improvements on my journey and the techniques I use in each image and describe the techniques on why I enjoy or don't enjoy the photograph and which one is the best out of the galleries and why I think this. Also describing it by using a variety of techniques and setting I used in the picture to make it stand out I will also show my photoshop skills to show that I can improve photos with photoshop and make it stand out more by using a range of skills on photoshop. In addition to show my use of knowledge and progression I will quote which one is the best out of each gallery and why and also quote which one is the worst in my opinion and explain why. This will show my use of knowledge on camera techniques, setting and the skills develop through out my lessons.
I will show my progress by producing a website of all my photographs to show the improvements on my journey and the techniques I use in each image and describe the techniques on why I enjoy or don't enjoy the photograph and which one is the best out of the galleries and why I think this. Also describing it by using a variety of techniques and setting I used in the picture to make it stand out I will also show my photoshop skills to show that I can improve photos with photoshop and make it stand out more by using a range of skills on photoshop. In addition to show my use of knowledge and progression I will quote which one is the best out of each gallery and why and also quote which one is the worst in my opinion and explain why. This will show my use of knowledge on camera techniques, setting and the skills develop through out my lessons.
What do you hope to learn?
During my journey in photography I desire to learn a variety of techniques to use on a camera such as shutter speed white balance and different use of filters like tungsten. With this I can improve my images without having to photoshop. However I would like to develop better knowledge and skills in the photoshop side of photography to improve my photo's and change the appearance to make an virtuoso photo. Another thing I would like to learn is how to use descriptive and photography language to describe an image like just by looking at the photo knowing what techniques were used and the ISO and white balanced used in the photograph. Furthermore I would also hope to learn how to capture rule of thirds in my images.
During my journey in photography I desire to learn a variety of techniques to use on a camera such as shutter speed white balance and different use of filters like tungsten. With this I can improve my images without having to photoshop. However I would like to develop better knowledge and skills in the photoshop side of photography to improve my photo's and change the appearance to make an virtuoso photo. Another thing I would like to learn is how to use descriptive and photography language to describe an image like just by looking at the photo knowing what techniques were used and the ISO and white balanced used in the photograph. Furthermore I would also hope to learn how to capture rule of thirds in my images.
Sandra Bartocha

Context
Sandra Bartocha (1980) is a German freelance photographer and author specialising in natural landscapes, forests and plants as well as abstract work, with the specific aim of creating images that evoke an emotional response. The beauty of nature and natural light is a great source of inspiration to Sandra. She tries to photograph nature in an artistic way rather than trying to document it, focusing on details, light, colours and moods and using creative camera techniques to capture the beauty of a scene in the best way.
Sandra is vice president of the Society of German Nature Photographers (GDT) and is chief editor of the magazine GDT Forum Naturfotografie. Her pictures have been published in European magazines, several coffee table and how-to books, as well as calendars. She travelled all over Europe to show her audiovisual presentations Rhythm of Nature & LYS and has presented her more artistic work in numerous exhibitions. Her images have received prizes in numerous international competitions – including the International Photography Awards, European Wildlife Photographer of the Year, Asferico, Biophoto and the Wildlife Photographer of the Year competition in 2010, 2011, 2012, 2014, and 2016.
She was one of the photographic team on the pan-European Wild Wonders of Europe initiative and has been working on a long-term project about the north of Europe – LYS. As a result she produced a 45min audiovisual show as well as a large coffee table book LYS – An Intimate Journey to the North. Recent projects include regional work in northern Germany as well as a new long-term project about tree species.
Composition
The foreground of this image is the tree on the right hand side as it outlines the image and frames it, likewise the radiant green greeneries that hang out in every one of the orange ferns. In the midground we can see that it is paler than the foreground. In the back behind the trees it goes into and all the shading begins to blur into a pale dim shading of grey the further the distance is. This creates a depth of field. In this image we can see there is a vanishing point from the left hand side tree to the right hand side tree as the greenery and green plants make a triangular shape with its solid driving lines (strong leading lines). All of the trees are the solid places of the photo as they add interest and profundity to the image making it stand out. As I would see it I think this was taken during early morning as it we can see it is very splendid and the lighting is delicate. In the photo we can see there is a dark fog or shade covering the image, she may have used a grey hue or filter for this image. This makes it seem as though that the landscape is hazy and foggy; She has snapped this photo straight on/from an eye level view this makes it so it seems like you can stroll into the photo and arise with it or interface with the photo. Furthermore it causes the photo to feel more practical. The way this photograph is taken causes me to accept it has been edited firmly to cause you to feel like your a piece of the image, furthermore by doing this it catches more detail of the trees and greeneries and permits us to see the surface more and dynamic quality of the image. We can see the various shades on the trees and shadows around the tree. The white trees that nearly disguises with the fog/mist. They have cropped the image tightly to focus solely on the ferns and trees and nothing else on the sides this also creates the effect as if you can be in the image and you are a part of it. We can see the use of rule of thirds as we can see two thirds are the ferns and one third is the grey background. As she had said on her website she said that "The only tool is the camera. For my interpretation of the environment I use the possibilities of technology - to experiment with the choice of the section, shutter speed & aperture as well as multiple exposures to capture the essence & mood of a place."
Information taken from:
https://www-bartocha--photography-com.translate.goog/index.php?section=about&sub_ueber=philosophie&_x_tr_sl=de&_x_tr_tl=en&_x_tr_hl=en&_x_tr_pto=sc
Information taken from:
https://www-bartocha--photography-com.translate.goog/index.php?section=about&sub_ueber=philosophie&_x_tr_sl=de&_x_tr_tl=en&_x_tr_hl=en&_x_tr_pto=sc
Connection
This image she has captured was taken in a western area as we can see there is autumn leaves and a warm feeling to the image.
This photograph links to my work as I have also been to a western location and captured images of autumn leaves and ferns and she is also working on the texture in nature as am I so her work really links to mine and she captures pictures of landscapes and nature which is also my topic theme and to capture the unique texture in natures creation.
She was able to capture so many things in a single photograph and has used a wide range of photography techniques and methods. The way she has used these techniques to produce this image by cropping it tightly to make it feel as if you are part of the image and her work creates a certain feeling for each image she has taken each one having an effect on the viewer.
Comment
In my opinion I am not interested in photos such as these as I want to capture rivers and mountains and I personally don't enjoy the grey fog theme around the image as I want clear bright images and to capture the vibrant colours of trees and leaves. Their work is amazing but it isn't in my specific taste and I aspire to capture pictures like Aaron Siskind. But because Sandra's work links to mine on the theme of the texture in nature it does catch my interest partially because I do aspire to take more photos of landscapes of autumn themed places but to also take pictures of more green areas and sunny areas. Furthermore I aspire to have similar photos as mesmerizing as one of these great artists. I also aspire to use their techniques of tight cropping and to use rule of thirds in my photographs also to capture the soft lighting.
Edward Weston Research

Context
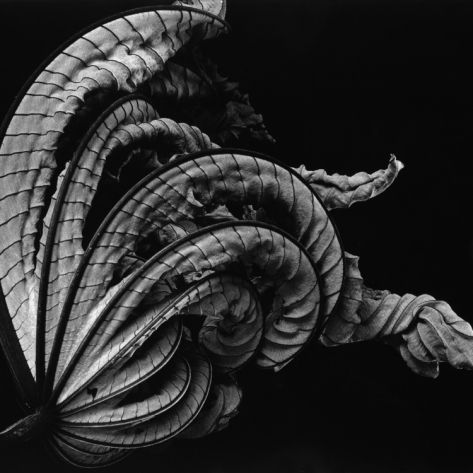
Edward Weston was born on March 24 in 1886 at Highland Park, Illinois, U.S. He died on January 1 in 1958 at Carmel California, major American photographer of the early to mid-20th century, well known for his unique pictures, his main focus of pictures are natural forms and landscapes. He is quite famous and recognized for the texture in his photographs as you can see above he uses various filters and methods to make the texture of this cabbage stand out more, In addition his pictures are carefully composed, sharply focused images of natural forms, landscapes.
Composition
The image above was taken by Edward Weston. A few things we can infer and evaluate are the following: We can see that there is high contrast in the photo and exposure as there is some lighting illuminating the right hand side following up the cabbage and it gradually gets darker on the left. Some explicit information is that he uses a black and white filter to make the vegetable really emerge and make the texture really stand out. Moreover By using a black and white filter it enhances the texture and design on the vegetable. The picture was captured from a specific angle (from the bottom right). Another thing we can view and see is at the top it is darker which gives more depth to the photograph. In addition we can also infer the he had used the infinity curve technique/method with a black sheet of paper to create that pitch black background which allows the vegetables to protrude. Furthermore Edward had used high ISO in this photograph as we can see it is comparatively dark. There is strong leading lines in the picture and In my opinion the focal point of this image is the top. The photograph has some vignette as we can see the corners are pitch black but in the middle it is white and black. In my perspective I can see he has not used rule of thirds but it focuses on the whole of the cabbage. This image uses monochrome colours. The photographer has done the white balance and the ISO all manually as it was quite a while ago they didn't have the technology and equipment now, which makes me believe that he had used a tripod and used a slow shutter speed. The photograph was taken in a studio. The lighting and position that this photograph was taken from makes it look 3D, another thing is that Edward had cropped it rather slim and short so it focuses on the texture of the cabbage more.
Connection
Edward Weston work links to our work as we are both focusing on the texture of the object/item, and how we can use different settings and methods to make the texture stand out more and see the close details of the texture. In addition it also links to our them of nature as we are also focusing on it. Whether it is using an infinity curve or a torch for more lighting or different filters and etc. We are trying to develop our skills and use of knowledge to make the texture of our item stand out.
Comment
In my opinion I like this photograph and find it amusing and I'm inspired to have mesmerizing photographs such as his, using various filters and methods to achieve that goal of mine. I really like how strongly we can see the texture of it and the strong leading lines in my view. This image is outstanding to me and hope that one day I will reach this level of photography skills.
Brett Weston
Context
Brett Weston (1911-1993) is widely regarded as one of the leading photographers of the twentieth century. He is known primarily for his bold compositions based on Western landscapes and natural forms, and for his extraordinary printing style. Weston was among a small group of California photographers in the 1930s, known as the Group f/64, who favoured large-format view cameras, straight and uncropped images, and stark black-and-white prints.
Composition
Brett Weston is the second son of Edward Weston therefore they will have used the same or similar techniques and methods to make their photograph more eye-catching. In addition, this means that they have used similar contrast, lighting, backgrounds, ISO, angles and etc. This image gas a vast amount of strong leading lines as shown and many curves that catch my attention. This is a studio shot as we can see the texture and detail very clearly would need specific equipment but seeing as this is a couple of years ahead of Edward Weston's time there may have been more advanced technology and equipment. Bret has cropped this image as we can see a part of it has been cut of on the left hand side this is because he wants to bring peoples attention to the shell and not the surroundings as that is his main focus in this image. Brett has done the ISO and white balance all manually. As I had said in the start Brett is the second son of Edward Weston so that is why their images are rather alike. We can see that it is illuminated on the bottom left this leads me to think they have used a light light source to flash on that specific are. The angles and methods used in this picture has made it look 3D as we can see the curves really emerge out of the picture. By making the shell white and the background black we can really see the shells details making it the focus of this image. This photo was taken on a slow shutter speed ad was captured on a tripod.
Connection
Brett Weston work links to our work as we are both focusing on the texture of the object/item, including how we have used different settings and methods to make the texture of our item stand out more and see the details of the texture. Whether it is using an infinity curve or a torch for more lighting or different filters and etc. We are trying to develop our skills and use of knowledge to make the texture of our item stand out just as he has done in that photograph.
Comment
In my opinion I do admire the photograph and do aspire to capture wonderful photographs and have the ability to take pictures the same as the Weston family has taken. I really enjoy the structure of this object as I can see from my perspective there is a variety of strong leading lines and how the texture emerges from the picture making it stand out. I hope that one day I can develop these photography skills.
Mood Boards


Shoot 1
Starting to develop camera techniques using a DSLR Canon Camera on manual settings, I started looking into white balance, ISO and exposure and composition techniques based on my research.


BEST
In my opinion this is the best because if you have a close look at the leaves you can see it is more focused than the other sides leaves. It may be hard to see but you can see the texture more and it the best on out of the rest.
|
WORST
On the other hand this one is the worst because it is less focused on the texture as i said before it may be difficult to see but if you look at the leaves you can see it is a bit blurry than the best one and someone's blazer was in the photograph.
|


BEST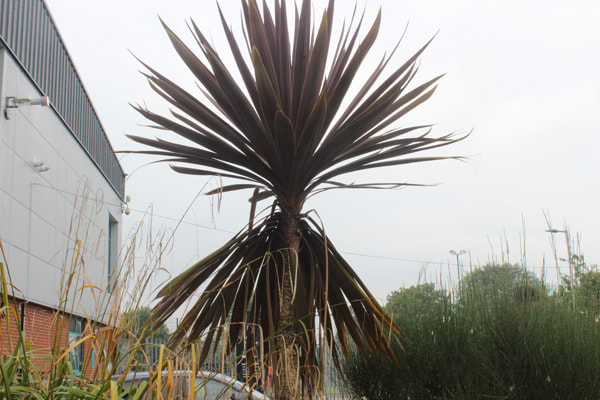
Majority of these pictures are relatively the same but this one has stood out the most to me as it is focusing on the plant and has included the scenery and background as well.
|
WORST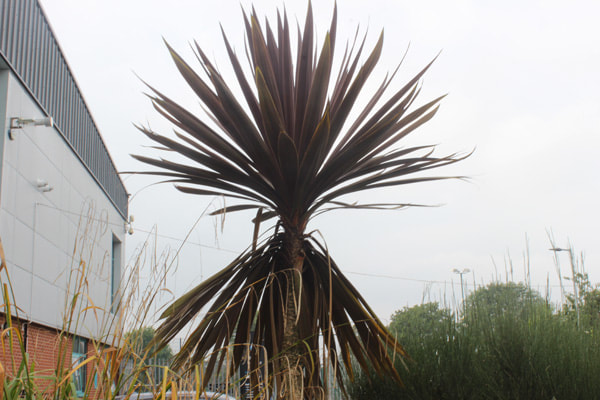
As I had stated before all these pictures are very similar but this one in my opinion focuses more on the plant and a bit of scenery that is why this one is the worst in my opinion.
|


Shoot 2


Shoot 3


Best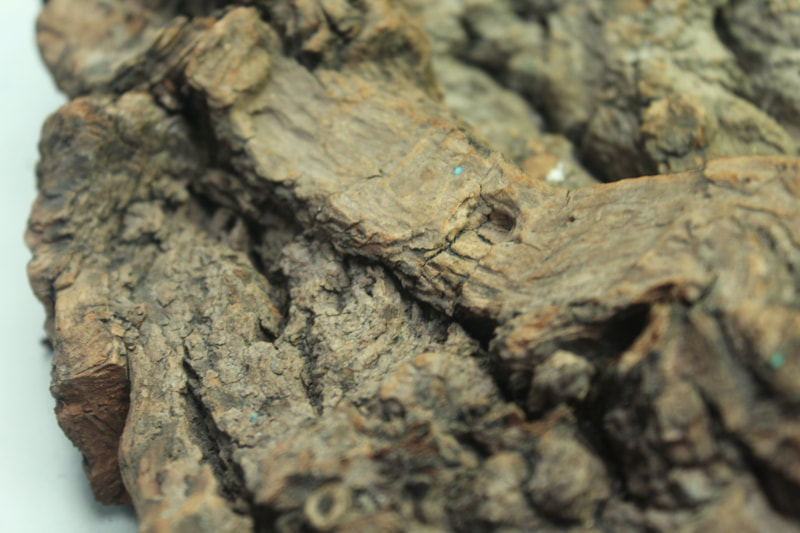
I think this is the best out of three because it is in focus and you can see the texture along the piece of bark and is a close up as well which allows for more things to be seen. Furthermore there is strong leading lines in the middle of the bark.
|
Worst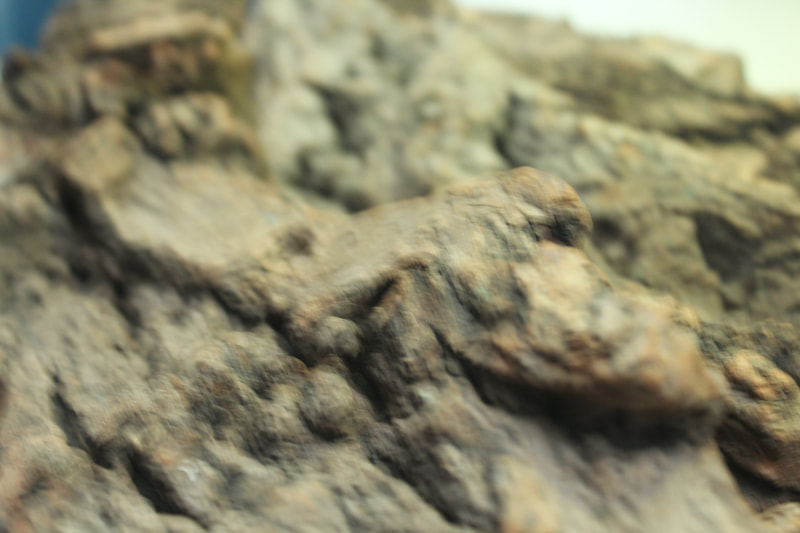
This is the worst out of three because it is out of focus and the patterns cannot be seen clearly and has captured something else in the top right that isn't the piece of paper that was used. In addition because of it being out of focus and blurry the texture can't be seen in the photo.
|


Best
This is the best out of the gallery of nails, bolts and screws because it is close up which allows us to see the design on the nails and the spiral on the them and because of the yellow light reflecting on the nails it makes it shine. It is in focus and its main point is the body of the screws as we can see the blunt end of the screw is out of focus.
|
Worst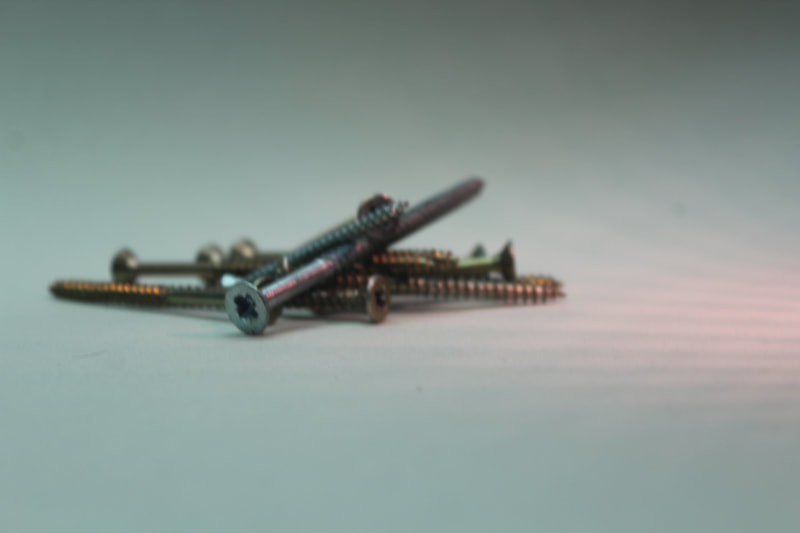
This is the worst out of the bunch in my opinion because it feels too far away from the camera and because it is a small object we wont be able to see much texture from far away and although the red light illuminating from the right is nice it doesn't reflect on the screws and make it shine. It is also out of focus as well.
|


Shoot 4


Best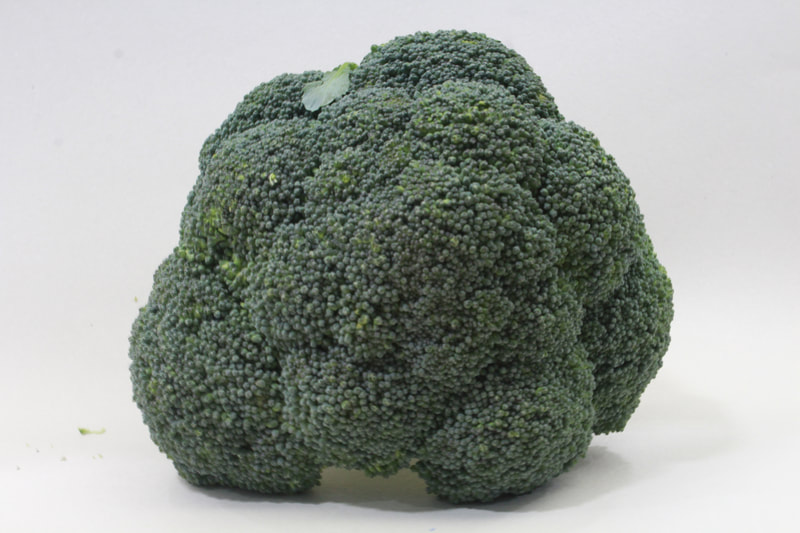
This is the best out of this gallery because it is in focus and you can see the texture on the outside and the little dots and it makes you feel as if you can feel the texture as if you were able to feel the rigid and bumpy edges and there is not anything in the background coming in and is in frame of the photo.
|
Worst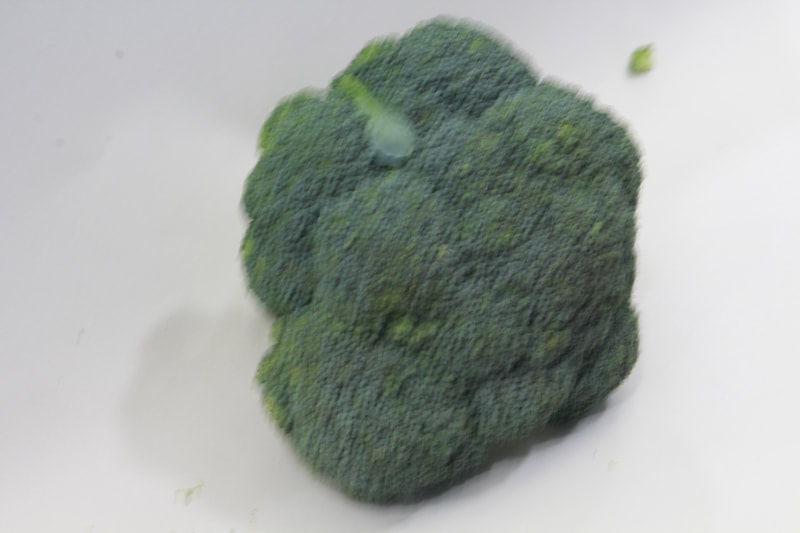
This is the worst one of this bunch of photos in my opinion. I think this because it is out of focus and the texture cant be seen at all and the shape itself I just don't enjoy the angle isn't something I value and I think the other one is a lot more better as it has a nice angle and this one has cubed shape which I don't like.
|


Best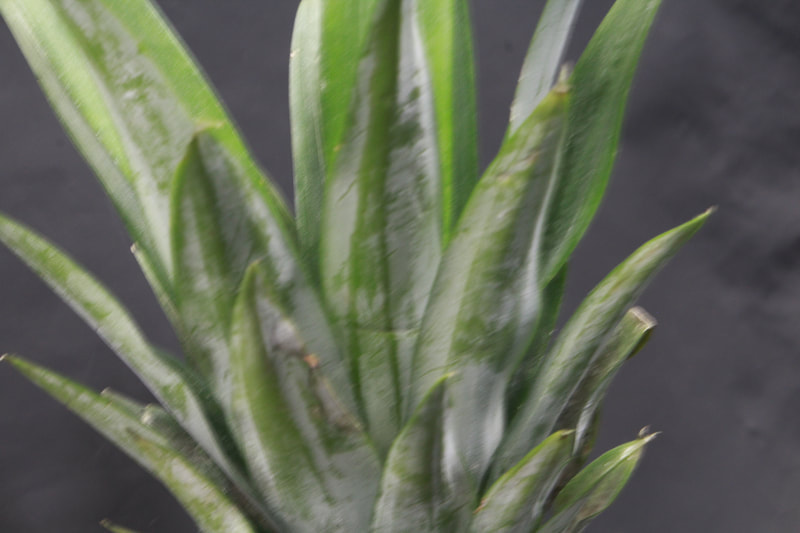
In my opinion they are all pretty bad and out of focus but I think this one is the most focused one out of the gallery and to be honest there is not much I can comment on about it as there is not much to say about it the only thing I think looks good is the background, as it is like a misty and foggy atmosphere.
|
Worst
As I stated in the previous photo they are all quite bad but this one is the least focused therefore I put it as the worst one again there is a mist and foggy theme around it but the main focus of the photograph is blurry. I think I had either had a slow shutter speed or I had moved just before I took the image that's why its had turned out like this.
|


Best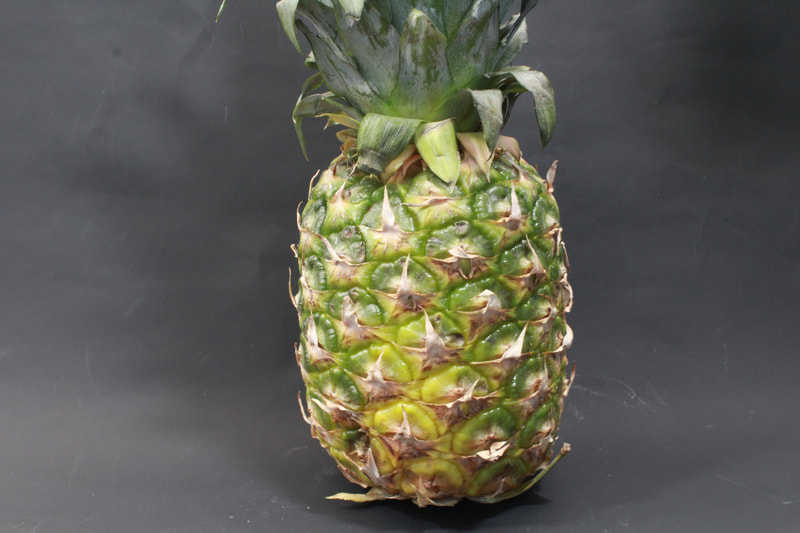
There was two that I had to make a decision on this one or the one below it in the gallery. In my opinion I liked this one more and I like the close up and prefer it close up rather from a distance and with it being close you can see the colour pattern as there is yellow in the bottom middle and then it blends into the green around it. You can also see the spikes on the edges of the pineapple clearly.
|
Worst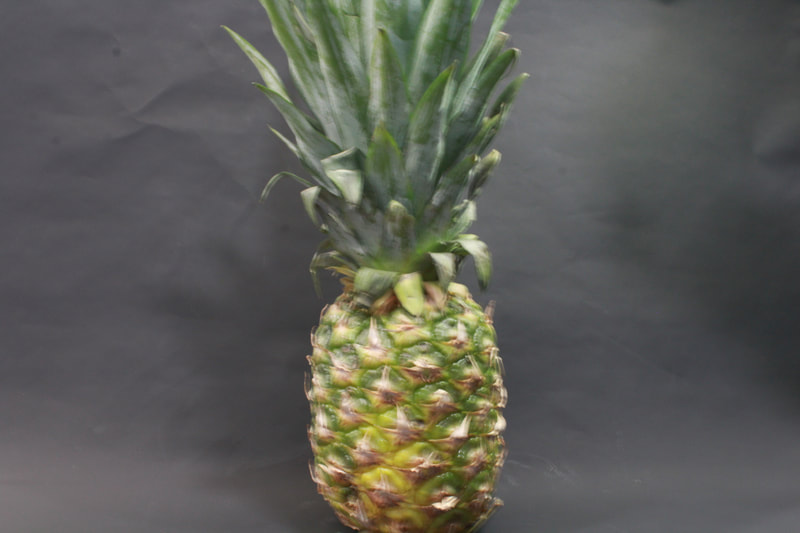
This is with most of the worsts on this website the worst ones are usually the out focused ones such as this one. The spiky leaf parts on top of the pineapple, personally I think it just ruins the image as it feels as if that's the main focus because of its size but I want the pineapple to be the main focus and I don't like how it is zoomed out like this.
|


Best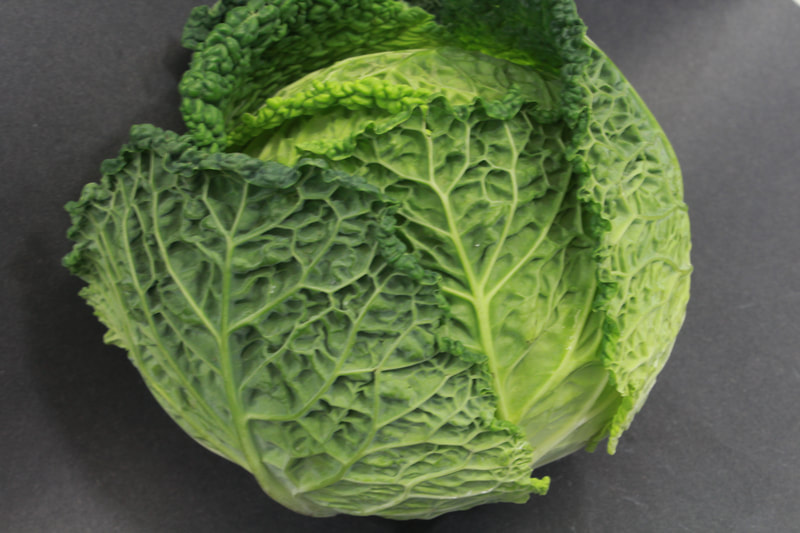
This the best out of the few as it is in focus and the texture is really clear and you can see the veiny structure of the vegetable and the strong leading lines it creates. On the top of the vegetable it is illuminated and highlighted as it is a different shade of green and it stands out.
|
Worst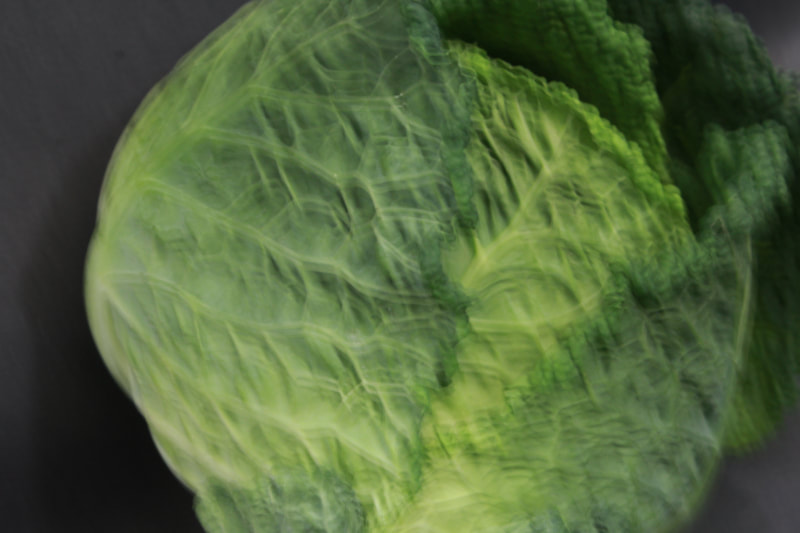
Again this is out of focus and the position it was taken from wasn't ideal and the texture cant be seen and there isn't any strong leading lines in this ones as there is in the other one and I feel if from a different angle it may have been a better image. I feel as if it is too close and should be taken from a further distance.
|


Best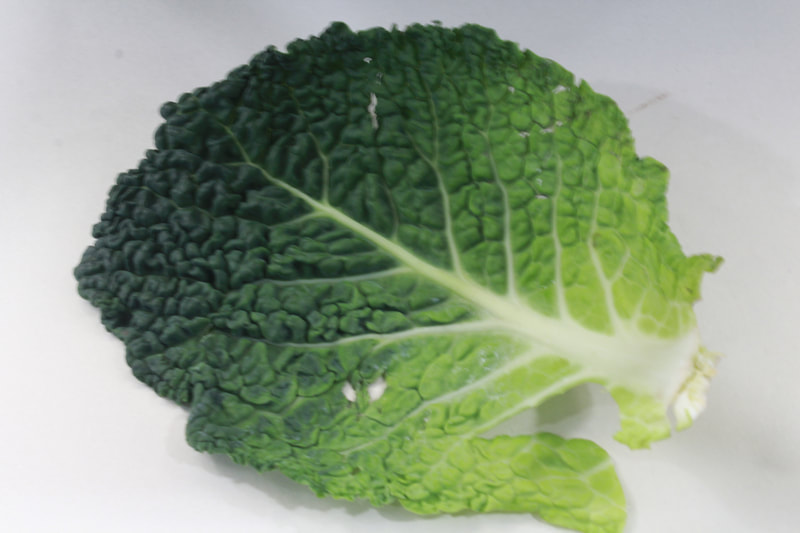
This the best out of the batch as it captures the entire leaf of the vegetable and how it fades from the bottom from a light green into a dark green and the strong leading line in the middle the vegetables leaf and how the bottom of it looks like its illuminating because of the lighting. We can also see the rigid and wavy texture of the leaf.
|
Worst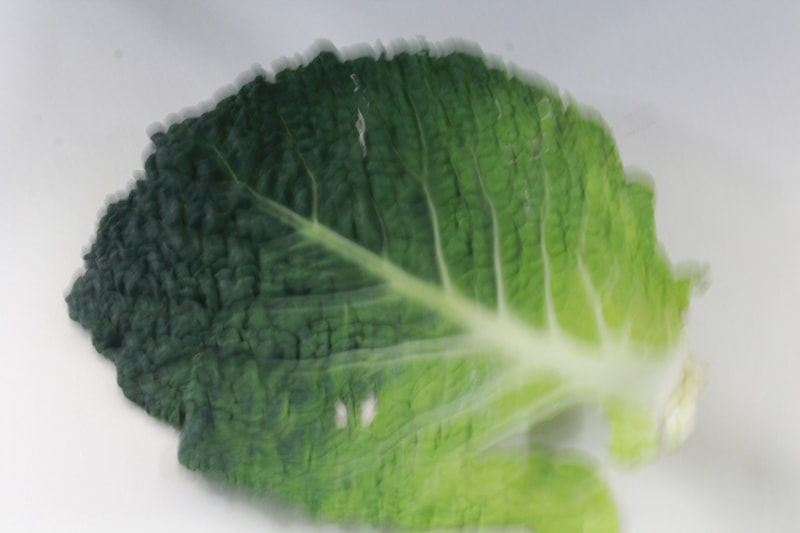
This is out of focus and goes out of the portrait a bit in the bottom of the screen and doesn't capture the whole of the leaf and the texture of it is really difficult to see and it is blurry. This is with every worst image and it is the same thing that is wrong with so I cant describe much about it as it is getting repetitive.
|


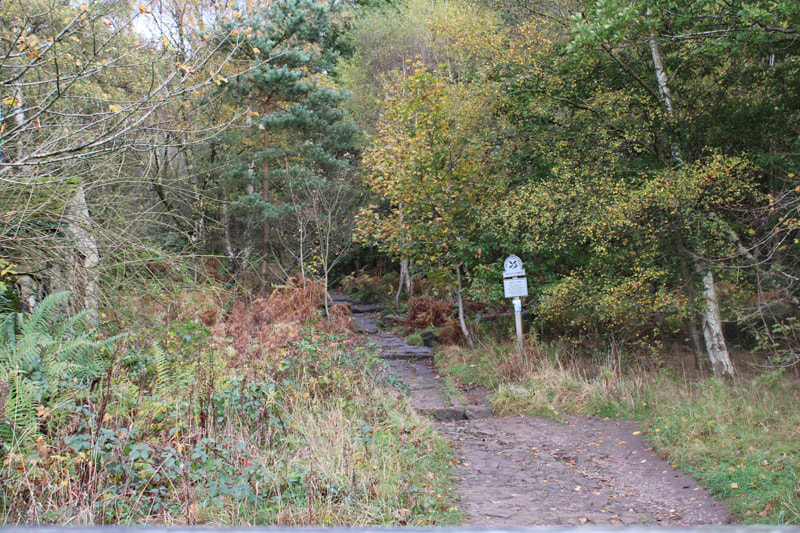
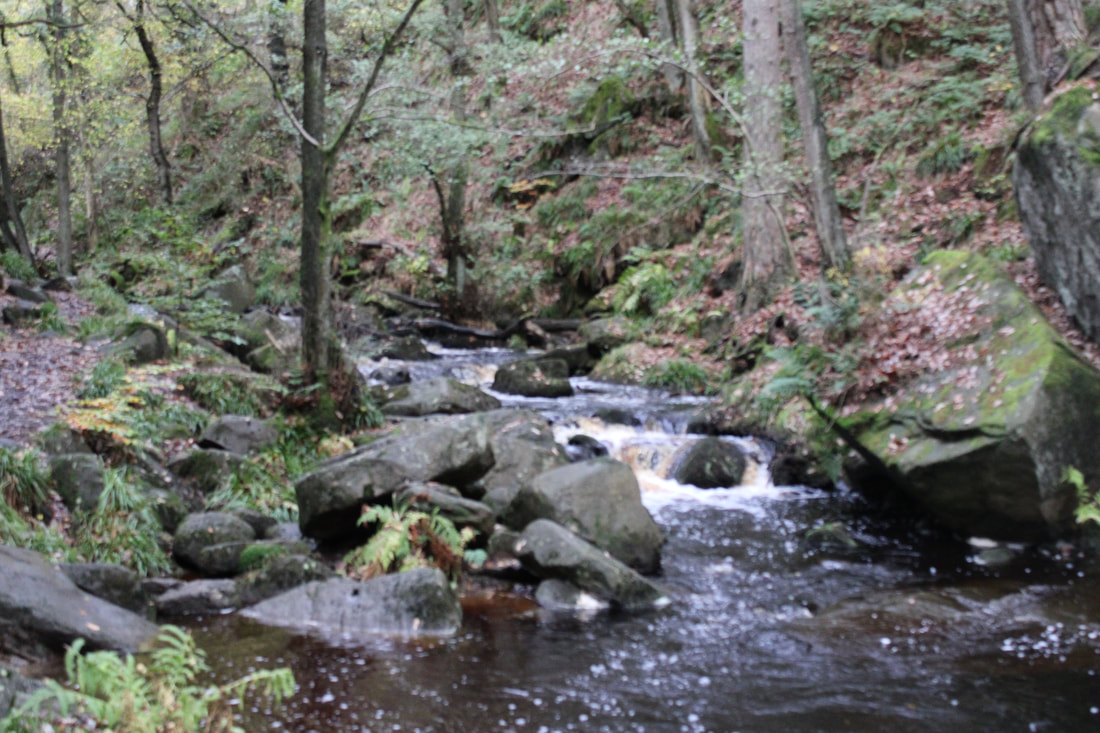
Padley Gorge
For the following photos I had ventured out into Padley Gorge to capture some images of the texture in nature and using my source of light from the sun and using natural lighting.
Railway


Ferns


Moss


Best
I like this the most as the light shining in from the top is a nice added touch and we can see the frizziness and texture on the moss.
|
Worst
This on is not bad it just does not stand out as much as the others in the gallery as you cant really focus on the texture here as it is not clear.
|
Tunnels


Walls


Pathways


Rocks


Sticks


Mushrooms


Gates


Leaves


Trees


Single Pictures


River


Hills


Slow Shutter speed pictures


Photoshop
Selective Colour
Before

Steps


After


In the final outcomes I had two final ones that I had liked and couldn't make a decision because I do enjoy the plain one its just nice and clean however with the one on the right I do also in enjoy the extra little things like making the cherry glow brighter and adding the little dots to make it look like it is snowing where it is and I think that It does improve the photo and make it look more advanced as well. In addition with the first one it is simple and it just looks nice especially with the yellow tainted background I also think this one has improved and enhanced the photo drastically. In conclusion I couldn't make a decision and have uploaded them both up. The video I watched for this tutorial was from: https://www.youtube.com/watch?v=2y_QbtgCinw
Glow
Before

Steps


After
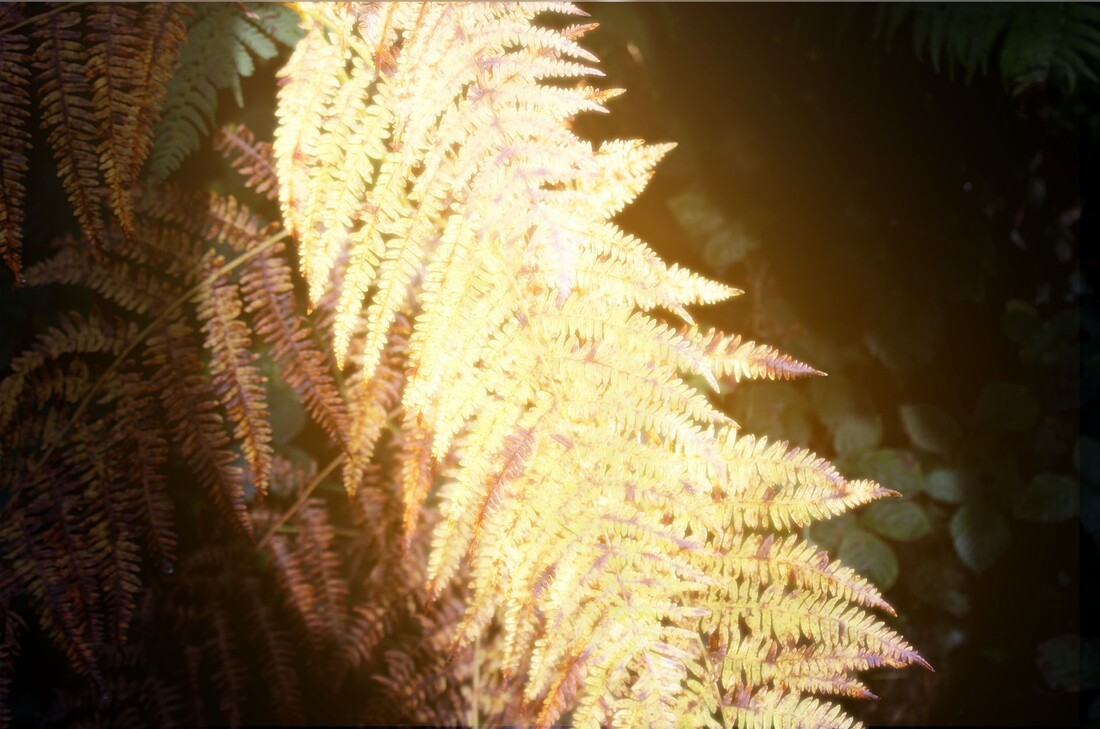
In my opinion and if I'm being truly honest I don't really like the way I have done the glow around the fern it was quite difficult to make it look like as if it is actually glowing and not just drawing around it I wanted it to look a lot more realistic but that is quite obvious that I drew it on using the contrast tool to make the outline but with the glow of the fern I do like that but I feel like it would have been better if I had removed the Gaussian blur on the fern I feel as If that would improve this final outcome but I will do this again another time and I will try and make it even better either using the same picture and improving on it or using a completely new photograph and see if I can make good improvements. The video I watched for this tutorial was from:
https://www.youtube.com/watch?v=mQSKseBlA4c
https://www.youtube.com/watch?v=mQSKseBlA4c
Outline
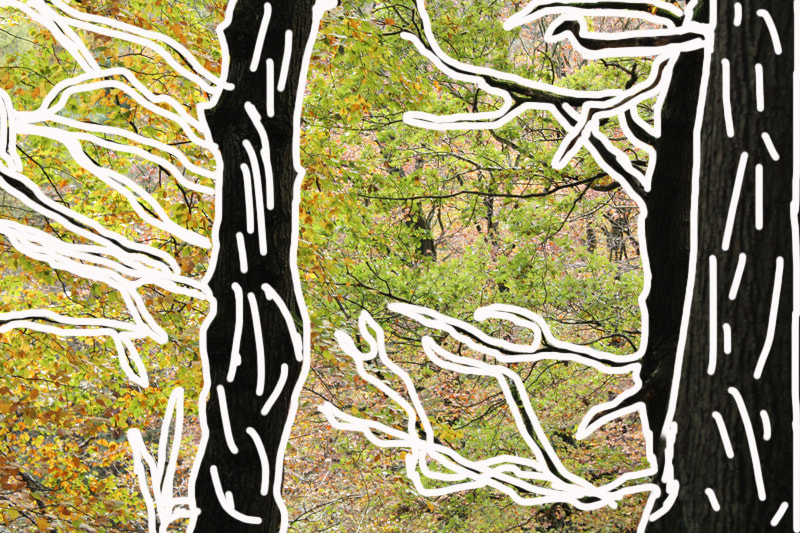
I didn't need to put in the steps as it is pretty self explanatory you just get the drawing or paint brush tool and simply draw the outlines of the trees and add some lines in the middle to create an effect that the texture is there and clear. I do actually like this even though it is a very simplistic edit I think it just makes it a lot more better and I cant name specifically what about it that makes it better or make me like it. I just like it and I don't really have an explanation for it. I guess I just fancy the basic look and I think it is just a nice little touch to the photograph and I like it.
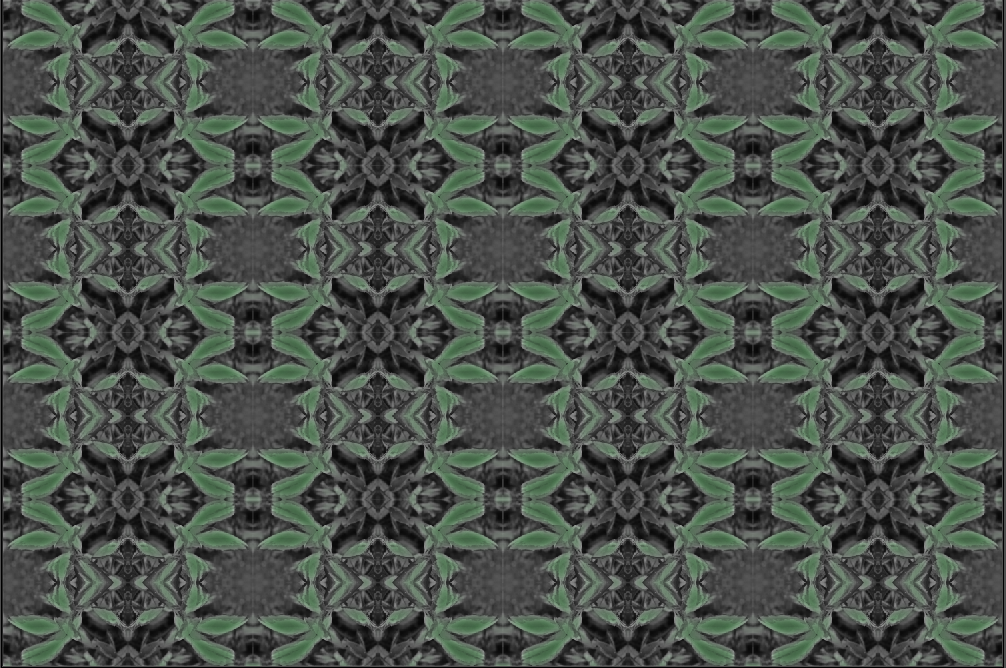
Kaleidoscope
Before
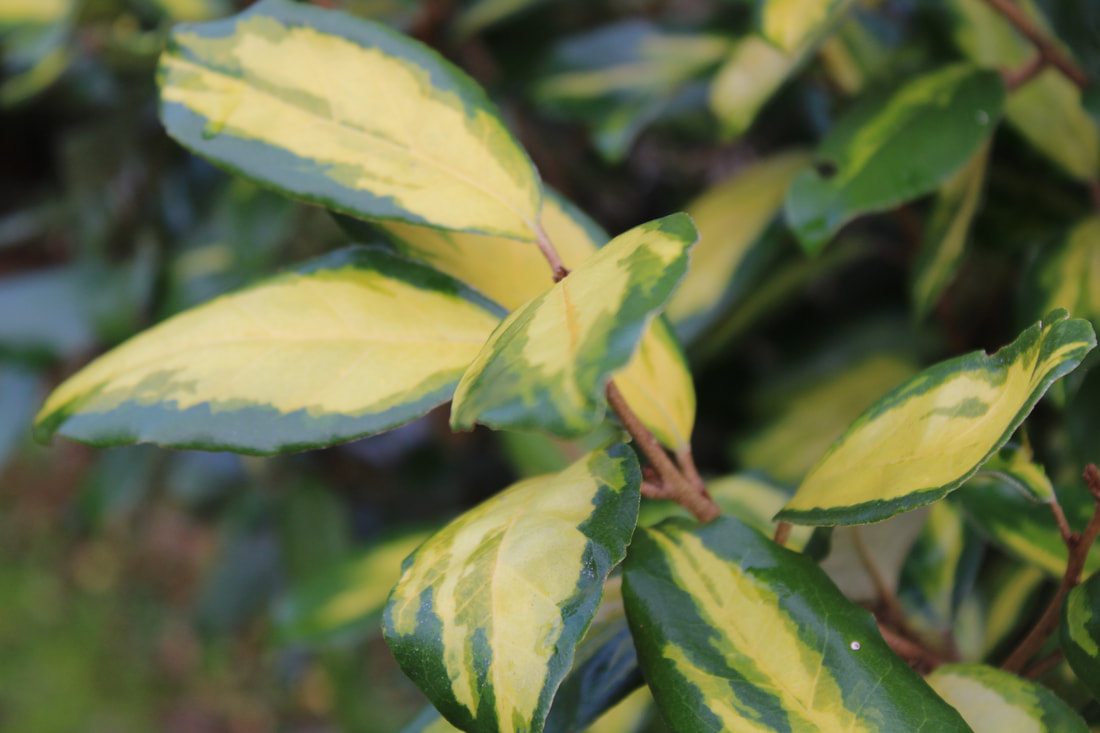
Steps


After
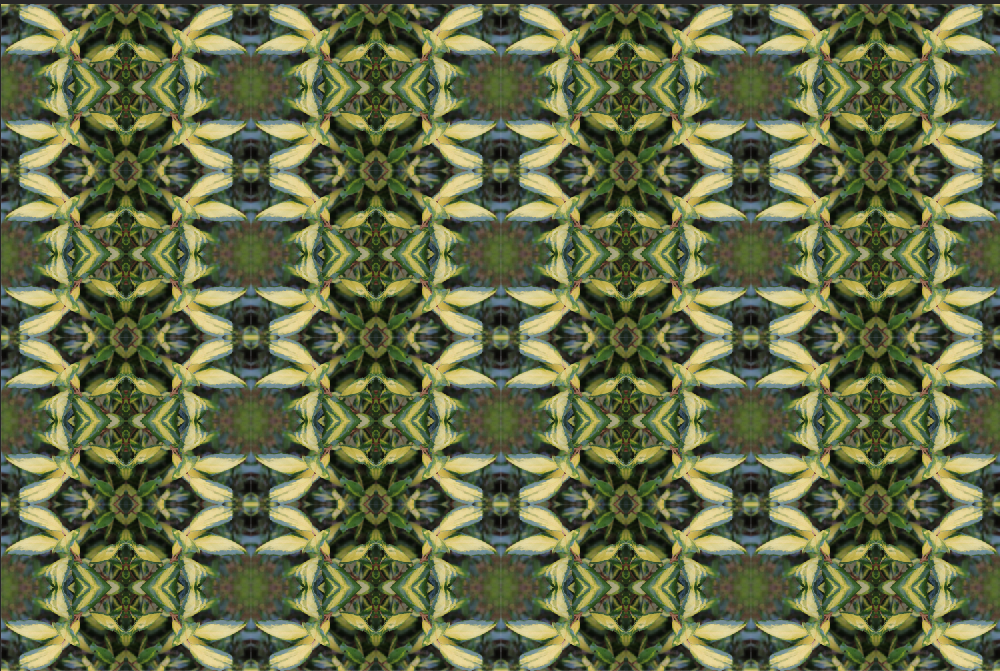
I am very happy with this final outcome and had a lot of fun making this. This is not in the steps but all I have done is taken step 6 and have repeated the process again making this. Personally I also liked the one in step 4 but I enjoy this one more as it creates an illusion and is mesmerizing. I do really like this effect and technique and I will use it in different images later on maybe and I like the picture I chose to make this effect a yellow and green leaf. I am really happy with this final outcome and had an experience while making it and I look forward to doing this again someday. The video I watched for this tutorial was from:
https://www.youtube.com/watch?v=aOz9F4RhB9k
https://www.youtube.com/watch?v=aOz9F4RhB9k
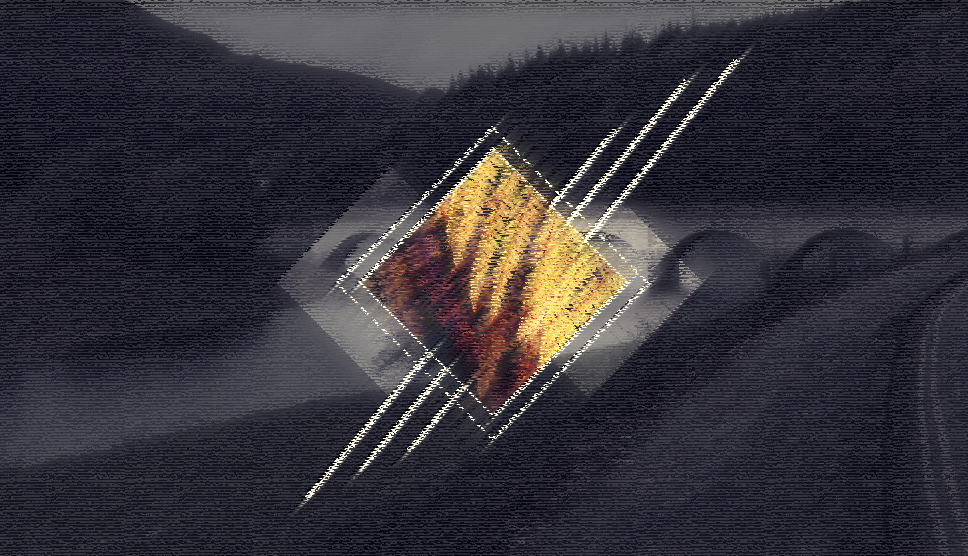
Geometric Shapes
Before

Steps


After
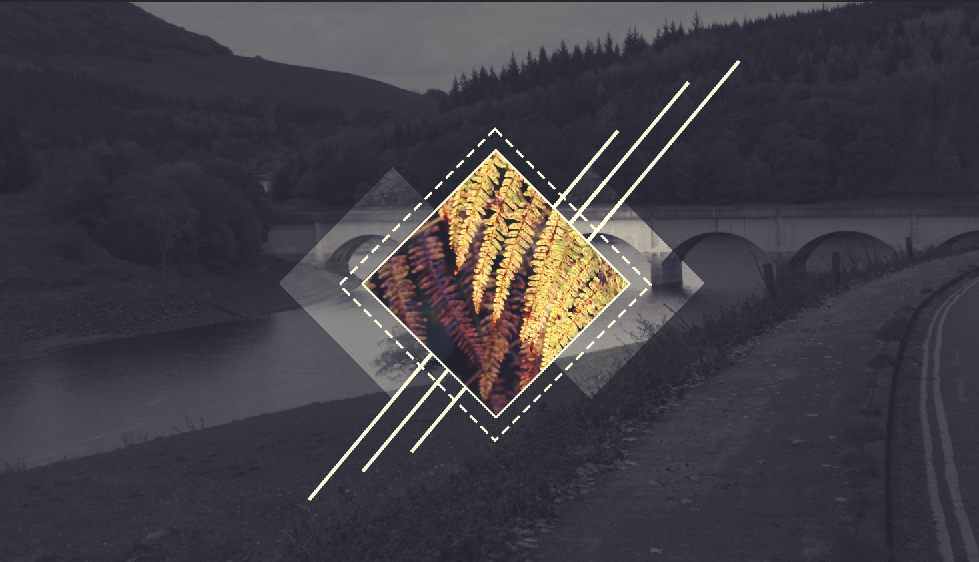
I am very happy on how this photoshops final outcome has turned out and I am proud of it. However, I do still feel as if there is more I can do to enhance and improve the phot to make it stand out more for example I could change the color of the back to a red or blue and then change the image in the center in the diamond to the opposite of that color so either red or blue or I could even do green and purple there is multiple way I can improve this. In addition I can also change the color of the outline or the shape and invert the lines or add something else than the lines. I could also add multiple and various shapes to it to make it loom more enhanced and I can put different images and colors. But I am happy overall but I do still think there is room for more improvements. The video I watched for this tutorial was from:
https://www.bing.com/videos/search?q=tutorial+creating+geometric+shapes+in+photoshop&adlt=STRICT&qpvt=tutorial+creating+geometric+shapes+in+photoshop&view=detail&mid=A8E4283AA08B9676B0AFA8E4283AA08B9676B0AF&&FORM=VRDGAR&ru=%2Fvideos%2Fsearch%3Fq%3Dtutorial%2Bcreating%2Bgeometric%2Bshapes%2Bin%2Bphotoshop%26qpvt%3Dtutorial%2Bcreating%2Bgeometric%2Bshapes%2Bin%2Bphotoshop%26form%3Dvdre%26ADLT%3DSTRICT
https://www.bing.com/videos/search?q=tutorial+creating+geometric+shapes+in+photoshop&adlt=STRICT&qpvt=tutorial+creating+geometric+shapes+in+photoshop&view=detail&mid=A8E4283AA08B9676B0AFA8E4283AA08B9676B0AF&&FORM=VRDGAR&ru=%2Fvideos%2Fsearch%3Fq%3Dtutorial%2Bcreating%2Bgeometric%2Bshapes%2Bin%2Bphotoshop%26qpvt%3Dtutorial%2Bcreating%2Bgeometric%2Bshapes%2Bin%2Bphotoshop%26form%3Dvdre%26ADLT%3DSTRICT
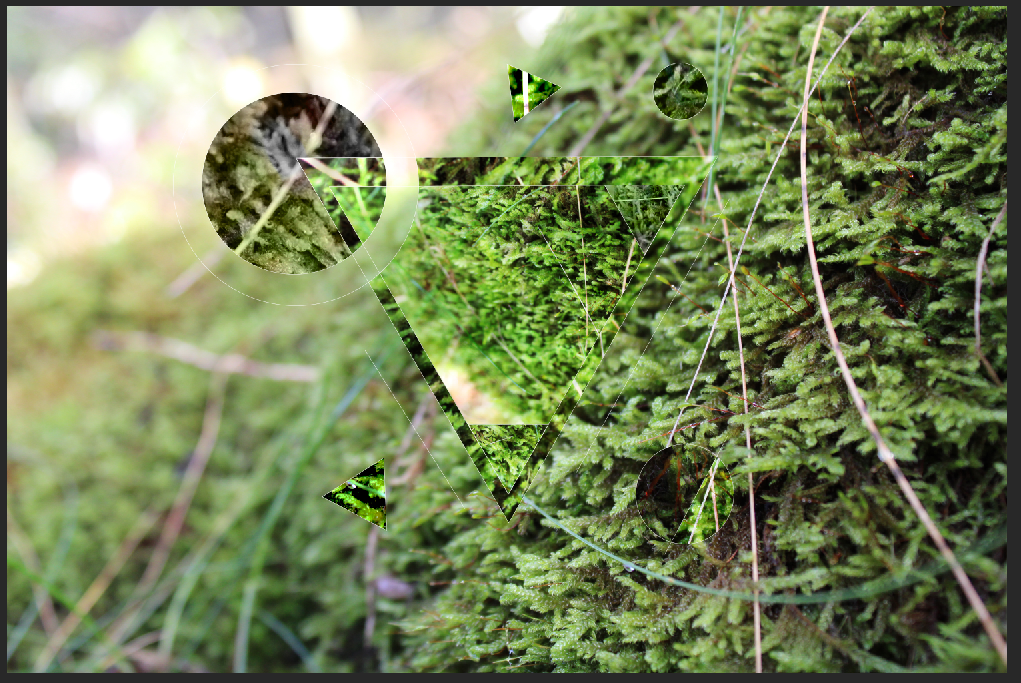
Geometric Shapes:
Before

Steps


I am very happy how the backgrounds gradient has turned out and even though it is quite basic and simplistic I really like it like this I prefer my first attempt on geometric shapes more and the picture I have chosen to go in the shapes I feel there might be a better choice of option and instead of having a plain background with some detail I will put a different picture that opposes the colors inside the shape as the colours inside the shape are warm colors I could make the background with some cold colors rather than a melancholy background.
https://www.youtube.com/watch?v=BmskYPHkDTE
https://www.youtube.com/watch?v=BmskYPHkDTE
Geometric Shapes 2
Before

Steps


After
Kiwi Kaleidoscope Edit
Before

Steps


After

Final Gallery


|


|
Evaluation
My theme was different texture in nature and I explored the different types of it such as the leaves, bark, hills, trees, rivers, moss, ferns, pathways, rocks and sticks. I thought the theme was good because I was able to take pictures of images I liked and the huge variety of things in nature that can be captured. In addition there is also man made texture which I also really enjoy and I find intriguing and I would like to explore it further and find outstanding images of manmade texture anywhere like on cars, steel, metal, carbon fiber, mails, screws, bolts and etc. Therefore with huge variety of objects and items that have texture this allowed me to be creative with my photo's and I am able to pick multiple different textures from different objects and especially with nature as there is loads of texture in nature and so many techniques and equipment that could be used to enhance them even better than they are. This had drastically improved my skills and knowledge on photography. I think the skill I have most developed in would be the use of the camera and my understanding of it and how I can use different setting to make my images stand out and be eye-catching.
In photography I found the use of photoshop the most interesting and intriguing part of photography because I enjoyed editing my work and enhancing the images that I have captured. It is amazing that you can completely change the appearance of the image and how many techniques there is in photoshop like I have done above. Geometric shapes, selective colour, kaleidoscope, outlining, glow, double exposure and more. There is a huge variety of ways to edit images and photos to improve them. This why I found the use of photoshop the most interesting because of how many ways there are to advance and image and it could be the same image but have a completely different look. Furthermore photoshop has multiple tools to use to also help on your image like the contrast tool, crop tool, blur tool, shape tool and etc.
I have experienced numerous techniques during my learning journey. Firstly, building a website using Weebly as a new skill that I did not know before. In addition I have also learned how to photoshop. For example: copy and paste layers and use the tools on photoshop. I have learnt how to edit photographs in a profuse ways. These would be selective colour, glow, geometric images, outlining and creating a kaleidoscope effect using photoshop adobe. I had watched multiple videos and tutorials to be able to produce these edited images. The videos I have watched as of right now to do these edits are the following:
Geometric shapes- https://www.bing.com/videos/search?q=tutorial+creating+geometric+shapes+in+photoshop&adlt=STRICT&qpvt=tutorial+creating+geometric+shapes+in+photoshop&view=detail&mid=A8E4283AA08B9676B0AFA8E4283AA08B9676B0AF&&FORM=VRDGAR&ru=%2Fvideos%2Fsearch%3Fq%3Dtutorial%2Bcreating%2Bgeometric%2Bshapes%2Bin%2Bphotoshop%26qpvt%3Dtutorial%2Bcreating%2Bgeometric%2Bshapes%2Bin%2Bphotoshop%26form%3Dvdre%26ADLT%3DSTRICT
Selective colour- https://www.youtube.com/watch?v=2y_QbtgCinw
Glow- https://www.youtube.com/watch?v=mQSKseBlA4c
Kaleidoscope- https://www.youtube.com/watch?v=aOz9F4RhB9k
Geometric Shapes 2- https://www.youtube.com/watch?v=BmskYPHkDTE
These are the videos and tutorials I had used for photoshop. I have had to use a wide variety of tools for each of these edits. I have used almost every tool on photoshop adobe 2021. Here are the tools:
- Magic wand too
- move tool
- Rectangle marquee tool
- elliptical marquee tool
- lasso tool
- quick selection tool
- fill tool
- crop tool
- object selection tool
- eyedropper tool
- brush tool
- eraser tool
- magic eraser tool
- clone stamp tool
- dodge tool
- hand tool
- zoom tool
- Aperture
- Shutter speed
- ISO
- camera mode
- metering mode
- focus mode
- focus area
- white balance
- file format
- drive mode
- long exposure noise reduction
- High ISO noise reduction
- colour space
- image stabilization
- HDR/DRO
I would like to further develop my skills more in photoshop on how to use dodge tool. The doge tool makes there area more brighter and increases the contrast. when using the contrast tool by clicking it it will make the are brighter but it depends on how much you hold it down. I would like to learn how to ,make my pictures look realistic and try and blend it instead of making the entire image illuminate. For my next project I would like to learn about lighting and how to make my photographs illuminate perfectly and try and get the lighting on the correct side. I would like to use different strength of lighting by using strong lights to weak lights and use a variety to further develop my images and photographs. I would also like to do a couple of studio shots to make my work look professional but to also increase my knowledge of skill using more advanced equipment to make an executive photo.
In my hunt for photographers, I came across three that captures images of natural textures and piqued my curiosity. Paul Mitchell is the name of the photographer. His shots of nature stand out to me since they are on the same theme as what I am learning, and they have been and continue to be an inspiration to my work. I desire for my photography to capture people's attention in the same way that his have.
Aaron Siskind, a well-known American photographer noted for his use of texture in his images, is another photographer I've decided to investigate. Siskind's most well-known abstract work arose from a desire to use photography to not only record the subject, but also to reflect one's state of mind. He began photographing patterns and textures of everyday objects such coiled ropes, sand footprints, and algae in the early 1940s. I want to one day be able to take images like his.
Ansel Adams is the third photographer I've chosen to follow. Ansel Adams became well-known as a photographer of the American West, notably Yosemite National Park, and used his work to advocate wilderness protection. His classic black-and-white photographs aided in the acceptance of photography as a fine art form. I chose this photographer because his black and white images intrigue me, and I use his work because I have researched previous photographers who have also used these techniques of using black and white filters, and I enjoy them.
All of these photographers link to my work as the main thing we have in common is our topic of natural texture. These photographers have captured outstanding images of the texture that lies in nature and I to aspire to capture these magnificent pictures to one day. I will develop all my knowledge and skills of techniques and methods in photography to have outcomes such as these photographers have.
All of these photographers are linked to my work because we share the same interest in natural texture. These photographers have caught incredible shots of the texture found in nature, and I aim to take pictures like these one day. I will use all of my knowledge and talents in photography techniques and strategies to get the same results as these photographers. Their work inspires me to push myself further. The amount of effort and skill put into those photographers and how long it must of taken them to develop these skills inspires me. That is why after I have seen these images I had taken a few more natural texture of the same as them I have used techniques they have may have used I have enhanced my images the same way these people have enhanced theirs.
The one thing I have most enjoyed in my journey is photoshop. It amazes me how using a variety of tools and edits how much it can enhance an image and make it appear outstanding. Or the fact you can take an image and completely morph that image into something else but still be the same image. We can see this with my previous edits with for example the Kaleidoscope effect, by flipping and mirroring the image multiple times you can create a whole new outcome and it looks completely different from the original image. Such a huge amount of numerous tools and setting and filters and layers etc. to use to enhance an image. The reason I enjoy this the most is because it help me to explore new things which can also be applied in life to it would help me be more confident to try new things and to not stick with the same thing because I'm worried for what the outcome may be.
In my opinion my most successful part of this topic is photoshop. I had used numerous types of photoshop techniques and have had multiple good outcomes. A few of the photoshop effects and edits I had created are the following: Geometric shapes, glow, selective color, outlining, kaleidoscope effect. My best edits out of this selection im my opinion is geometric shaped which also the one I wish to focus more on. I feel like I could produce some wonderful outcomes for geometric shapes I have only made two outcomes as of right now and so far my first one also being my first attempt is my most favourite I am happy with the images I had selected to use in the shapes and I like how I have changed the background to a different colour from the inside instead of having similar colors. Therefore with all this detail I feel as if this is my strongest point and my most successful outcome yet to come.
There were a few issues on this learning journey. My main two being time management and also the pandemic covid. With covid i was limited on locations to go to capture images as they have been restricted by covid so there wasn't many possibilities for me. However after a while it had calmed down a bit and I was finally able to go to a location where various mesmerising images can be captured. This was a school trip to Padley Gorge. There was so many photos and images I had taken at least 300 images i had taken and majority of them coming out amazingly. By being able to go to locations my website and gallery looks so much more professional and I was not limited with how much I could take. Furthermore with the second issue, time. I am able to produce this work and photos and my writing but I am quite far behind all the time as I try and make my work as detailed as possibly as I can without rushing it but unfortunately I never have time as there is other work that I also need to spend time with. I have tried to counter this by doing some of the work at home whenever I am free and sometimes I mage to get some down and sometimes nothing at all. I have caught up on quite a lot of work but there is still much more work that is still required to be finished soon.
I have learned a humongous amount of skills and knowledge from the beginning of the year. I have learned all this by using multiple methods such as watching tutorials using photoshop using the manual setting on the camera. I had started photography with not a hint of knowledge on what I was doing or what anything was. I had researched and investigated many photographers and how they had started off and how they had become the outstanding artist they are today. There is so many settings on the cameras that I know and how to put them into use and so many photoshop tools to use to enhance my photographs. I didn't even know how to take the picture when I had started because it was so many buttons and it just made it complicated. But with the help of all the resources I have I was able to adapt and improve and expand my knowledge on photography.
As I had stated in the paragraph before the one before this My two biggest issues was corona and time management. My main one being time management. In every subject I do I am always the last one to finish or the last one to answer or sometimes I'm just so slow that I don't even manage to get the answer. This is how it is in tests too. When we are put in a test with a time limit the pressure gets to me and to think I don't have any time to waste and just have to write as fast as I can due to me lacking the ability to write quickly I am not able to write anything detailed at all and I am to rush all of it as I need to try and have a go at every question. In conclusion the main thing I want to do if I was to redo this topic is to learn how I can manage my time and to not break under pressure as I am very easily pressured. Even so I can always get a tutor or go to an online class to help expand my knowledge so there is even more I can write about and make my writing even more detailed using photography terms.
