Width defines the range, where the tool detects edges.
Edge Contrast defines tool's sensitivity
Frequency defines how often the tool sets anchor points.
Click on the image to set the first anchor point.
Draw with Magnetic Lasso to outline the object. The tool automatically creates fstening points (anchors) clinging to object's edges.
To force a fastening point (to set an anchor manually) click at a key point.
When you come near the first anchor points it looks like this . Click to close the contour.
You can also double-click to close contour at anytime and any point.
While New selection option chosen on the Options bar by creating new selection you delete existing one.
To add an area to existing selection you have either to choose Add to selection option on the Options bar or to press (and hold) [Shift] key while selecting.
To subtract an area from existing selection you have either to choose Subtract from selection option on the Options bar or to press [Alt] key while selecting.
To intersect new selection with existing one either choose Intersect with selection option on the Options bar or press [Shift+Alt] keys while selecting.
While New selection option is chosen and the point of cursor is within selected area the tool looks like this and can move selection (ie. borders of selected area and not image content).
While New selection option is chosen you can also move selection using keyboard cursor keys.
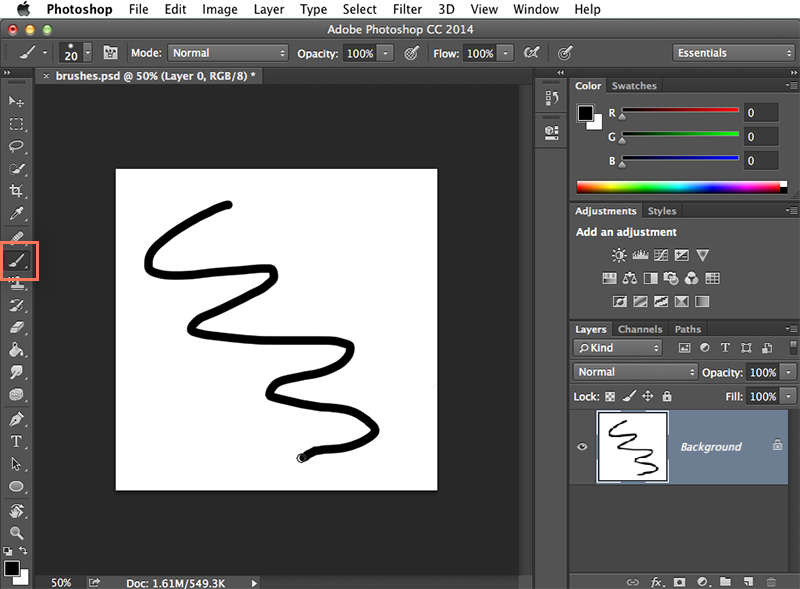
What Is Photoshop's Brush Tool? A primary painting tool is the Brush Tool. It applies colour with strokes, just like a traditional drawing tool. It's in the normal toolbar, and the letter B is the default shortcut. One of the most fundamental tools in graphic design and editing software is the brush tool. It's part of a painting tool set that includes things like pencil tools, pen tools, fill colour, and more. It allows the user to paint with the specified colour on a picture or photograph. From the Tool Options panel, you may select from a variety of brush tips for the Brush tool. You apply paint on a canvas with the Brush tool, much like you would with a brush. You can paint inside type selections, apply colour to selected areas, and paint in selection channels, among other things.
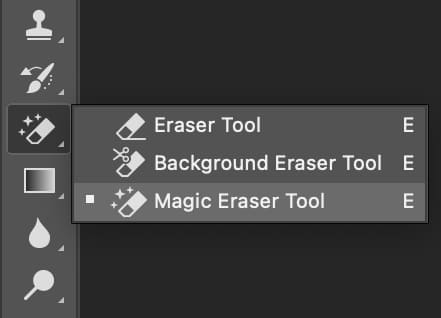
Eraser tool
If you erase on the Background layer, the Eraser tool puts a colour on the photo. When you paint with this tool on the Background layer, it uses the current background colour. If your photo is on a layer, the Eraser tool works similarly to a regular eraser, deleting pixels as you drag across the image. Parts of the active layer or selection can be removed with this tool. When working with multi-layered photographs, it can be advantageous since erasing bits of an upper layer allows lower layers to show through.
Paint Bucket tool
In Photoshop Elements, the Paint Bucket Tool fills nearby pixels with the same colour value as the pixels you select. It uses the selected foreground colour or a pattern to fill these pixels. To utilise the Paint Bucket Tool in Photoshop Elements, go to the Toolbox and select "Paint Bucket Tool." When you click the Paint Bucket tool in a photo, it does two independent tasks. It starts by making a selection similar to that made with the Magic Wand tool. The foreground colour fills the specified area when the selection is made. In similar words the Paint Bucket tool fills an area with a colour value that is similar to the pixels you click. You can use the foreground colour or a pattern to fill an area.
Gradient tool
Create a gradient on a layer or within a selected region with the Gradient tool. The Tool Options panel has a number of gradient colour options, or you can add custom colours to create the gradient effect. Go to the Tools menu on the left of your screen to find the gradient tool in Photoshop. Unless you've changed it, it's around halfway down the toolbar. The emblem could resemble a paint barrel. When you click and hold this symbol, the gradient tool icon appears (as shown on the inset in the image above.) The Gradient Tool, for example, allows us to make seamless transitions between layers by drawing gradients across layers, selections, or layer masks. Gradients can be used to fill text and objects.
Smart Brush tool
The Smart Brush tools are found in the Tool Options panel, as seen in the picture. The tools, as shown in the picture, have options that you can select from a pop-up menu. Select one from the Toolbox and, if necessary, the Tool Options Bar to use Smart Brush tools in Photoshop Elements. Then, as needed, adjust the settings in the Tool Options Bar. You can make a "New Selection" here, or add to or remove from an existing one. To make your selection, click the corresponding button.