Statement of Intent
I want to create a website with examples of my ideas, growth, creative work, and reflection centered on the theme of "Objects." I will select my favourite photographs and exhibit them in a final gallery at the conclusion of my
For my photographers I will look into Colin Wilson who uses single objects and maybe a little touch if a small object placed around or on top of the large object and creating an image of a single object that may have a unique and abnormal shape to it or an item that is quite intriguing. I feel I can take insight from their ideas and work and apply it to my own to develop my skills and understanding of photography.
In addition I will also research Camila Catrambone who uses various objects and multiple objects and captures these from a top down view and the objects she selects all link to one specific theme like kitchen tools or workshop tools and such. I think this is a great idea and look forward to producing some galleries and such using her techniques and method and her idea.
My third photographer is Jim Golden who’s photography is similar to Camila but much more variety of objects and uses vibrant colours or even all the colours and fades them together but all the colours are one objects like different colours of gloves or something. I find this very interesting feel this will improve my website drastically if I were to produce some galleries such using this insight.
When I had chosen this project I had originally thought of stationary and different special objects with abnormal shapes and texture to use and capture images of. I thought of capturing multiple objects that all have one thing in common and laying it out in a specific way that can create some illusions or create some nice interesting images by also experimenting with the background and how I position the object weather I wasn’t it standing or in something or dangling form something this is what I had thought to capture images of. I would then refine these images in photoshop.
I'll start by taking pictures of the kitchenware, culinary components, and workshop tools that I can bring to school to demonstrate my development via my labour. Next, using more inspiration from these photographs, I will further improve them by modifying them in Photoshop. The next step is to experiment with using only one object and capturing the image from a specific point or angle to see what the results might be. With this project, I already have a tonne of thoughts racing through my head, which will help me move in the proper direction.
For my equipment I will use a canon camera I will use some props that I will bring in such as workshop tools or kitchenware and lay them out the background can be anything but I will also use some large sheets of paper of different colour and place my objects on. I will also use different lighting either from a lamp or my phone.
I have three months to complete the work on my website in preparation for the creation of my final product. In order to allow myself the time I need to demonstrate progress, I plan to do my preliminary research within the first three weeks and begin taking photographs by the fourth week. Then, I'll continue to develop my work in Photoshop and be ready to experiment with object placement, layout, and addition. I'll also use my camera to take new photos that will improve my project. I will choose the best photography results from the project and display them in my final gallery.
I'll utilise annotations to clearly mark my thoughts and developments as my project develops on my webpage. This will also enable me to evaluate my own work. In order to improve my work and push myself to new heights, I will mostly ask my tutors and classmates for guidance. Together with finding my own, I'll watch tutorials and examples to further my understanding of Photoshop. I will write a final evaluation of the project after I have finished building my final portfolio, reflecting on what went well and what I would do better or modify if I had more time.
Mind map to show my first ideas

Colin Wilson

Context
Colin Wilson is a British photographer based in Derby. His practice is rooted in the still life and his long term projects focus on ‘rhopography’, the depiction of that which is considered insignificant. The simplicity of his compositions allows for a meticulous and expressive examination of carefully selected objects whose forms have immense force. Working on large format film and hand printing each print, his process mirrors the contemplative quality of the images. His work has been exhibited both nationally and internationally, including Belgium, Germany, Hungary and Poland and is held in the corporate collections of Deutsche Leasing AG (European Photography collection) Germany and the Mag Collection (Late C20th Contemporary Art)
Composition
In this image I can see that he has created an infinite curve that creates the sense of a void highlights the foreground (the objects), which is unmistakably the main focus of the image. As the distance between the items and the backdrop is discernible, depth of field is also experimented with. In my opinion, the aperture might be changed to f/16 because there is no haze and everything is in sharp focus. Due to their height and out of sight, the base of the colander forms leading lines. Leading lines are also produced by the diamonds on the vase, but they are a little less obvious. Although I could expect the ISO to be around 700-900 due to the photo being inside, however it is rather difficult to calculate the white balance and ISO because the image is black and white. The image has been cropped very closely, with all of the corners being equal and the objects being at eye level. I think that each of these factors highlights the image's allure even more. This picture to me looks like it had been taken in a studio using studio lighting. It is obvious that the lights are being shun on the left side of the camera since one side of the items is darker than the other. The products' disparate materials provide a luminous effect, such as the steel's sheen. You wonder if there was a particular rationale for the choice of materials because of how different they are. Curves and rounded finishes appear to be a potential trend. In addition I am pulled in and intrigued by ho symmetrical it is and I feel like the lite some pebble on top adds so much to it without affecting the image at all.
Connect
His work and photographs link to my work and I was intrigued by his style and found his images amusing therefore had picked to research him my work will look similar and hope my work will turn out like this I like how he used multiple props and stacks them of places them on top of each other instead of spreading it all out and the ay he uses the objects. That is why I had picked him and the connections he has to my theme and work.
Comment
In my opinion I am really interested in his work and I like his work and especially this image I like how he adds little objects and props and the huge effect it has on the detail of the image and how it changed everything whilst also still being the same thing. I like how he takes his images in a black an white font and creates that old theme around his images.


Camilla Catrambone

Context
Camila Catrambone is a portrait photographer of sorts, yet her carefully arranged images -- homages to her family members -- feature no smiles, faces or even bodies. Instead, the Florence-based artist creates photographs of her relatives using personal belongings, ranging from leather satchels and handkerchiefs to blocks of cheese and cookware. Catrambone grew up close to her family. Born in rural Florence, she lived in an old peasant house on top of a hill, without any neighbours. The house itself was divided into three apartments, one of which was occupied by her maternal grandparents, Mario and Ilva.
Composition
I am really fascinated by her work and this image in particular. I like how she had not only used kitchen equipment but had used food and ingredients as well adding to that cooking and kitchen theme to the image.
Furthermore they way she has made this layout and organised it in a way and how she had had positioned it in different direction, not all vertical or horizontal and had used both and the way she had sorted the food and ingredients out as well how she had scattered some of the ingredients around what looks like a kitchen table. The lightning in this images is angles from top down around the top middle of the of the image and how the lightning fades into the shade and creates shadow creates a gradient for the background. The reflection of the light reflecting on the silver utensils is a nice addition and improves the detail on the image. I like the contrast in kitchen equipment and how there are silver untensils to wooden equipment and pans of sorts and not only just tools and equipment but ingredients and the food variation creates and just enhances that theme of kitchen/cooking. The variation of vibrant colours in the image on the ingredients and on the tools standing out and drawing the viewers attention to it. On the long objects there a leading lines as you follow one all the way and then spot another object and then your attention is brought in by that object and it goes all around. The ISO seems quite high as the image is not dark and is relatively bright in my opinion I think the ISO is set aroud 1000-1200
Furthermore they way she has made this layout and organised it in a way and how she had had positioned it in different direction, not all vertical or horizontal and had used both and the way she had sorted the food and ingredients out as well how she had scattered some of the ingredients around what looks like a kitchen table. The lightning in this images is angles from top down around the top middle of the of the image and how the lightning fades into the shade and creates shadow creates a gradient for the background. The reflection of the light reflecting on the silver utensils is a nice addition and improves the detail on the image. I like the contrast in kitchen equipment and how there are silver untensils to wooden equipment and pans of sorts and not only just tools and equipment but ingredients and the food variation creates and just enhances that theme of kitchen/cooking. The variation of vibrant colours in the image on the ingredients and on the tools standing out and drawing the viewers attention to it. On the long objects there a leading lines as you follow one all the way and then spot another object and then your attention is brought in by that object and it goes all around. The ISO seems quite high as the image is not dark and is relatively bright in my opinion I think the ISO is set aroud 1000-1200
Connection
This work links to my project as it uses multiple tool 'objects' and the layout of the work is how I want to layout my work and props and the way she makes these images the techniques and such is what I need to do so therefore I decided to research her as she links and connects to my work so therefore I have someone who images I can look up to and get inspiration from and use different ideas they have used and produce my own work.
Comment
I really like this image and the idea of this image and the image and the layout of the items and objects and how they all like to a theme and the way they scatters the food and ingredients. I might not do it like this and instead do some images like Jim Golden I like the idea of his work more then this so therefore I wont do all galleries of these and produce more coloured and colorful images and create a vibrant image.
Jim Golden

Context
An award-winning photographer and director specializing in still life and products, Jim brings an artist's eye and an enthusiast's passion to his work. He strives to capture the pared-down essence of his subjects, rather than impose a false sense of beauty upon them. Jim's collections are featured in Austin magazine Radcliffe's book "Things Organized Neatly" published by Universe/Rizzoli in 2016, the definitive volume for this direct and timeless style of photography. Jim's Barrette Collection image is showcased on the cover.
Composition
In this image I really like how they use all the colours instead of one and it all does not link to one theme but how they fade the colours as well and the huge variety of colours and objects all layed out. The use of the beige background instead of a white or black background I found that intriguing as most photographers use black or white paper for their background but Jim Golden has used a beige one. I also found how all the items are aligned and straightened perfectly and makes a perfect square. I think he had used a box or some tape around and then had used that to align and adjust the objects into perfect framing. This image was taken from a bird eye view and from facing downwards I think they must have used a stand of some sort to get the camera over the objects and then captured it. Or they had used a stool or a step ladder to get that extra height to take the image. I think in my opinion that this image was taken in a studio and it looks like a studio shot to me. I think that they had used bright light not natural light and had pointe it straight down. This image must have had somewhat high exposure and low ISO as the image is quite bright so therefore making me believe this.
Connection
The colour scheme of Jim Golden's artwork is incredibly inspirational to me because I'm interested in exploring neutral tones and creating well-balanced arrangements of objects. The use of objects to symbolise you or something that means a lot to you in life is a pretty significant factor I capture in my project, and the topic of instruments is a really wonderful illustration of that. This photo's cropping also gives me inspiration because, in my opinion, the ideal quantity is captured, and the even sides don't leave too much empty space on the blue background.
Comment
I really like Jim Goldens work I find it very inspiring to me and I think it is to many others too his techniques and methods are immaculate and I hope to create images such as his during this project and hope I can develop my learning and understanding in photography and improve in my skills in photography from help of Jim Golden.
Mood boards to show my initial ideas


Shoot 1
Plan:
I will bring in or use a variety of kitchen tools from home or use the schools equipment and lay it out in a specific order or randomly place the objects or I can use the tools to make a pattern then I will place these objects on a white plain surface. This image will be captured form a top down view so I will have to either place it on the floor or I will have to get on the table or a chair and then I will take the image. However it may be hard to capture all of it in high depth detail therefore some of the table or floors background will be shown so therefore I will crop the outline of it however I need to make sure I take it perfectly straight otherwise it will be difficult to crop the outsides. In addition I will use an A3 or A2 sheet of paper so I can fit all my equipment onto the paper. Or I might uses a textured background like wood or concrete or marble as if it is on a kitchen table.. I can either bring in multiple different coloured equipment or all the same or similar colour or just a bunch or random with no colour scheme but just on the same them like for the kitchen there's is not really any objects that are very colourful as it is all made out of steel or metal so therefore I cant create a colour scheme pattern.


Shoot 2
Here I decided to look into a wider range of themes and objects and decided to go with the theme of mechanical and engineering using gear cogs and such and laying them out differently. I will experiment which angle will be best for the image weather or not I should take the images with a single object or multiple if I could use different ways of framing and such. Then this will determine what route or path I decide to take next.


Shoot 2
For the next few shoots instead of creating a them of a thing or a place I had done colours and then later on for my refinement I think I will experiment how I can change the colours to a different colour or make the image more brighter or less brighter or do some selective colour and make the background black and white but make the red objects stand out.


Photoshop Outcome:
Before:

Steps/Snips:


After:

Shoot 3


Photoshop Outcome:
Before:

Snips/Steps:


After:
Shoot 4


Shoot 5
Photoshoot setup
For this photoshoot we had a professional photographer come in and used his technique and skill to help with my Images. We had used different equipment he has and different ways of taking this image. He had uploaded the camera onto the laptop which on this laptop you are able to change and adjust everything to improve the quality and such of the image to improve it.. We had a black background that had like chalk marks or something of the sort scattered on the boards which created as misty background.


Experiment
For these following images I had experimented with how I want to do this. Originally I had wanted to put it in a different position and layout but I had done this so I have some images that will link towards my research for Colin Wilson. Then after I had finished using the pot and an object for this I had used a goat skull. I had picked this as it has a unique and abnormal shape to it and thought it would suit my work well and link to my research and such. After I had done the photoshoot I had originally intended to do.


Best
I think in my opinion is the best image out of the gallery although the block is still visible the lighting is quite nice. However the block sticks out.
|
Worst
I think this is the worst personally because of the lighting I think it is really unbalanced and the left side is just too scintillating.
|
Shoot


Best
In my opinion this is the best out of the gallery because the lighting had finally got it where I was aiming for however the string and background still stand out but can be fixed using photoshop.
|
Worst
This one is still pretty good however it is really dark and the background and is not sticking out and showing and is really dark and the texture in the background is not showing.
|
Photoshop edit

The photo originally was already quite highly developed and was a high level image so not much editing was required so all I did was crop the bottom right of the image as some of the background was filling in and the wires which were hanging the skull I had used the spot healing brush and cautiously removed them without affecting the skull and background. I had very slightly used the dodge tool to blend the shade of the skull. In addition I had also slight rotated the image so that it look like it is more straight and not unbalanced falling to one side which was quite difficult as the horns aren't the same size and they don't slant to the right or left.
Although I really like these galleries and are some strong photo's I think in my opinion I prefer groups of objects but not like Jim Goldens where he had brought in numerous objects but only a small amount of objects like kitchen tool just bringing in a few or three utensils to capture images of instead of using colourful and numerous small or large objects and laying them out when I can use a much more smaller amount. I think I will capture some more images such as the ones I had done in the beginning of this project and follow and link my photos to the photographer I researched Camilla Catrambone.
Shoot Plan
For my next shoot I will be bringing in home kitchen utensils like a spoon a fork and knife however I may borrow the knife from the catering class. I will bring in three things I use in my life or I will bring in a bunch of ingredients needed to make a particular dish and layout the objects. I will use a A3/4 paper to lay my objects out on. Or I will find a marble kind of background to use to create that kitchen theme. I will shine a light using my phones flash onto the objects to add that shine in the utensils and add more depth and detail to the image. I will also be taking this image from a top down view. I may bring in old and special utensils not just the basic and original one maybe some old antique or some with unique designing on them to improve the object make it more interesting and less boring. This idea was inspired by Camilla Catrambone who had layed out kitchen equipment and food ingredients on a kitchen top or on a plain white piece of paper. I will produce similar images to her work so it links to my research.
Example:

Shoot 6


Best
In my opinion this is the best image out of the galleries I really like the burnt and old rusted shiny parts on the knife and fork creating the rainbow. I like the layout of the image and how the light is coming in from the left hand side and fades into the dark as it goes right.
|
Worst
I don't particularly like this image personally as I don't like the angle which it was taken from and the background leaks into the image. The image looks and feel a bit dry and empty and there is not enough quality and detail in it.
|
Shoot 7


During the process of making these images I had taken one of the spoon individually and had seen a shadow be created and as I moved the light and such it would create a bigger, smaller, weaker, stronger shadow. This is when I had thought of an idea to try and capture the shadow of the objects that I can then use t create different objects in front like changing the object but still having the same object. In my next shoot I ill attempt to try and create some galleries and outcomes like these as I think it will strengthen my website and enhance my skills.
Shoot 8


Photoshop Edit
Before:


Steps:


After:


Photoshop Edit 2:
Before:


Steps:


After:


Shoot 9
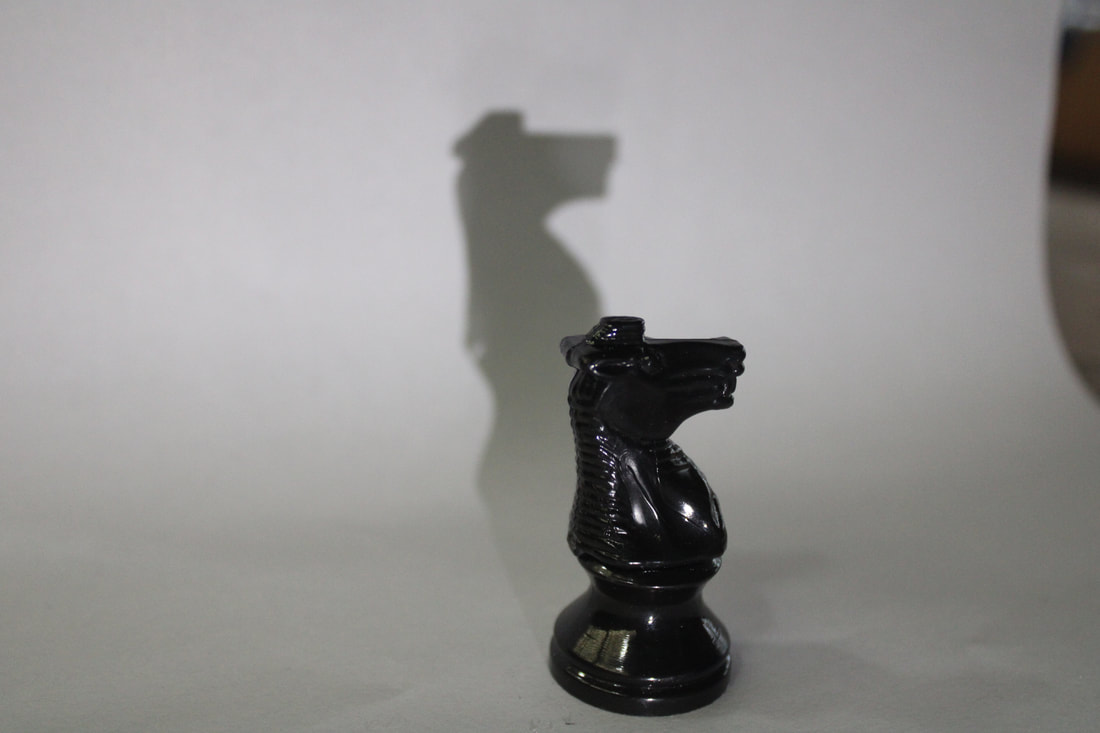
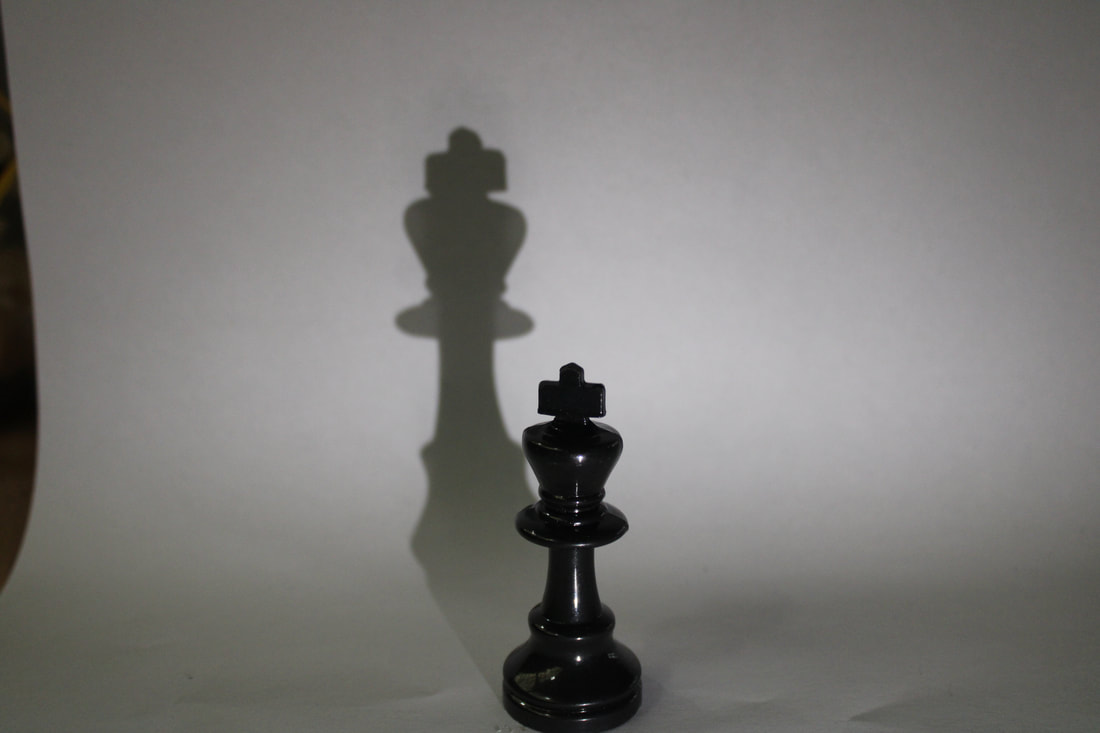
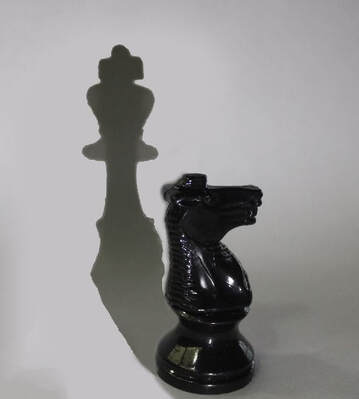
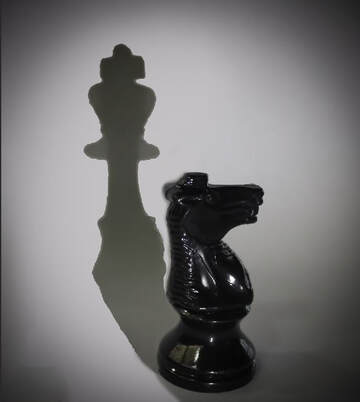
For this shoot when I was researching and analyzing my spoon and fork images with the shadows I relaised the design and shape of a spoon and fork or knife is really basic and not interesting that is why for this next shoot I decided to take the images around the shadows of the chess pieces because the shadows they make a unique shap and shadow.


Evaluation
My main theme was different from the other ones I had done. This subject was about objects and using different objects and items that all link to one theme. I explored the different types of ways I can layout the items and the amount of tools I use in the images weather I want to colour code using a variety of colours and blending and fading them into each other. Weather I want to lay them all out in a pattern of just row by row. Such as following a theme of kitchen tools or machinery like gear cogs or food or old collectibles that mean something to you and have a history with.
I thought the theme was good because I was able to take images of objects that I liked and knew I can edit and do some refinement on that will let me achieve a high grade and make my website look much more better and skilled. It would show my skills that I have and my creativity. It also has a lot of options and different various ways I'm able to take pictures of and different edits I can do.
This topic required a lot of creativity because I had to think of the objects I choose and the theme I want to go along with. I also need to think of the ways I can edit the images and improve them or I can layout the objects and the angle which I take it from. This is why it takes a lot of creativity and time to think about what I want to do for the next step that I can do.
In the process of building this website and topic I had increased and expanded my knowledge and skills on technique and methods and such for example camera use my skills have improved on that and my lighting skills have improved during the project.
In photography I found the use of Photoshop the most interesting because I enjoyed manipulating my work and improving the images had taken of the shadows from the utensils and chess pieces. I found changing the shadow of the object to another objects shadow. I liked the process I’m editing this image as it was quite fun and wasn’t a really long process was short but complicated and that’s why I enjoyed it so much because it wasn’t so difficult and takes almost an hour just to do one outcome it take a few mins but a lot of complicated settings tools are required for it and challenges me and my skills on photoshop.
A few skills I had learned from this project was my lighting and how I can make the shadow stand out and look more solid or more bigger by changing the distance or the angle of the light. I had also learned which camera setting would be best to make sure that the shadows detail is enhanced but as well as the object that way I am making sure the whole image is at high detail and will improve my website and galleries. I learnt using different ISO and such will enhance the shadows strength and make it look more fake and black and not faded same with when angling the light I had to make sure that I’m not to far away as the shadow will be faded and will not look as good when I decide to do some refinement on the work.
A key skill I want to improve on much more is lighting as my previous project also was strongly dependent on my lighting skills and I want to improve them so I won’t have to do as much in refinement to make sure the image is at the highest quality it can go before doing the actual edit. Another skill I would like to improve is my camera skills for the same reason as I want to make sure that the images I produce from the camera alone are good enough to almost not even need editing because there is nothing I can edit to make it look better. When we had the professional photographer coke in and help us take so images the images he helped me produce I couldn’t find anything to edit on and that’s how I aspire for my images to turn out like.
I had researched 3 photographers to learn and educate myself on what techniques and methods I can use to improve my work to produce some work similar to them. I had not copied their whole images and themes but I had just picked up some skills and layouts I can use from them to use in my work that will allow me to strengthen my website and improve my grade.
The first photographer I had researched was a person called Colin Wilson. This person has taken single objects and placed a random object around the image either on it below it next to it and has created most of his images in a black and white filter. I was originally going to follow them as my main theme throughout the journey of this project. Later on I decided I can produce some better images that will open more branches and pathways for me to follow. They link to my theme of objects as they capture images of single objects. I had also produced some images similar to their work and uploaded it to my website. I think this was a good person to research as it expanded my ability to layout the objects in an abnormal way and create an interesting image.
My second photographer that I researched was Camila Catrambone. She has a much different way than Colin Wilson. She uses multiple objects and lays them all out however all these objects link to one thing and one theme. Which is what intrigued me I wanted to take some images of multiple objects scattered around and layer out on a piece of paper and capture some images. One thing I noticed is she takes almost all of her photos from a Birds Eye view from top to down and I liked this angle and position to take photos in so started doing it a lot more often with the next few galleries I produced. She links to my work of objects because she gets a couple of objects that all have the same theme and have a meaning and that’s the sort of images I had aspired to to take.
My final third photographer is Jim Golden. He had produced similar work to Camilla Catrambone. However he used much more variety of objects and had organised them in a matter of colour and faded each colour into each other and I really liked the effect it had created and it had drawn in my attention. However I was not sure I would like to use that many objects and rather focus it on one or two objects so I can get as much detail of them instead of a huge load of objects as I won’t be able to get any high detail on every single object so therefore I decided I did not want to produce images like theirs but I did pickup and learnt a few new skills and techniques from them that I can apply in my own work to enhance my images and website.
Using and researching these photographers I had learned the various way I can layout my objects for an image. I learnt I can either focus on 1-3 objects or a a lot more objects. I can link all the objects to one theme and make them all have a meaning. I can use a huge bunch of objects with different vibrant colours and organise them in a matter that each of the colours fade into each other creating a nice pattern. I discovered new angles at which I can take the images from and the position in which I put my objects at and how I can capture the most detail on them. They all link to my then of objects they all have different methods and ways they portray objects and I can use these and expand my range of knowledge on how I can create some good outcomes for my website.
In my opinion I think that my photoshop outcomes will be my strongest point and supporting pillar in this project as I feel as if a lot of work was put into it and they are some detailed and high quality work. The process was very challenging so I think that it shows what I am capable of doing and the potential I have in the near future to use these skills to help me out myself in a better position. The part I most enjoyed was trying to clear the shadow to replace it without effecting the background as u had to be cautious to not make the background look messed up it unusual and make it look as casual as possible which was quite hard to manage and took multiple strokes and such to get rid of the shadow and not effect the object or the background so I can simply place the shadow of the other image into the other object.
As I had said before I think that trying to remove the shadow to replace it without effecting anything else in the image was quite challenging and one of the pints in my work where I encountered some errors and difficulties. In addition another thing I had encountered som issues with was my lighting as I had to make sure that the room is not too dark as the shadow will not show for some reason or the room is not too bright. That was just among sure I am in the right room but then when I let came to the actual lighting it was not strong enough and hadn’t stuck out as much and was faded. So therefore I had to try and create the perfect lighting which tools a few experiments but once I got it I overcame this error and barrier and moved past it.
How I learnt in this project was through the camera settings and experimenting on photoshop and just exploring the amount of different way I can edit and manipulate my work and change it to something else completely. The different lighting I can use which is where I think I have improved on the most and which I had struggled on the most as well during this project. I had learnt a lot from my research on the three photographers I looked up. As well as the professional photographer that had came in to help I learnt a few new things and such form him that I can apply for my work to and for future images I take how I can sues much mor equipment and the different ways you can take the image he showed me a lot of methods and techniques I can use. At the begging of photography during my texture project I was clueless and new to photography had no idea how to do anything or how ti edit and such. However as time went by I got better and improved near the end of that project. Then during my light and dark project I had learnt a lot more on the other side of photography ins stead of focusing on texture and detail I could focus on lighting and such which I where I started learning much more and expanding my knowledge. Then now on this project where I have improved a huge amount since the begging and all the new skills and such I have learnt up until now to compare my last image to my first image is a huge difference and improvement and you can see the knowledge and my work on the camera is advancing.
If I were to start this project again there would be a few things and tips I would give to myself to help me with my work. One of these being time management I need to make sure that I can capture these images and upload them and write my best and worst quick enough because usually this take me awhile to do and wastes time. Another thing I would do is try and organise my own shoots I have the ideas but I don’t want to show them or do them I let my teachers and peers teller me what would be the best thing for me to do and I don’t experiment enough. I need to be more independent and more active as when I need to take more photos I stay at my seat and continue to write when I don’t have the images I need which is also wasting time. I should also bring in my own props as I could have things that the school or the teacher does not have or can provide to me which I can provide for myself and I done my work. Another thing is I need to pick and stick to one thing rather than experimenting everything else as there’s not enough time and will end up being a waste to go and start something new when I had already produced a couple images of a certain and particular theme. These are all the things if I were to redo this project form scratch I would let myself know and do.
21st April, first exam, I will not add any more information or make any changes to the work above
Outcome 1:
Before:

|

|
Steps:
|
|
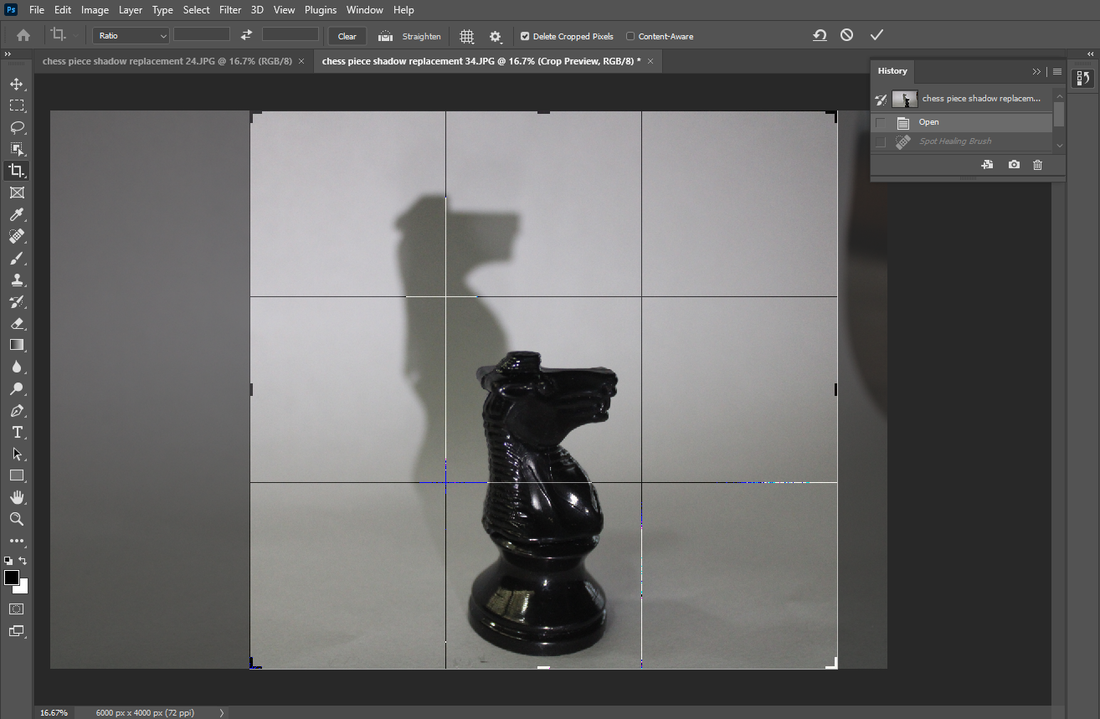
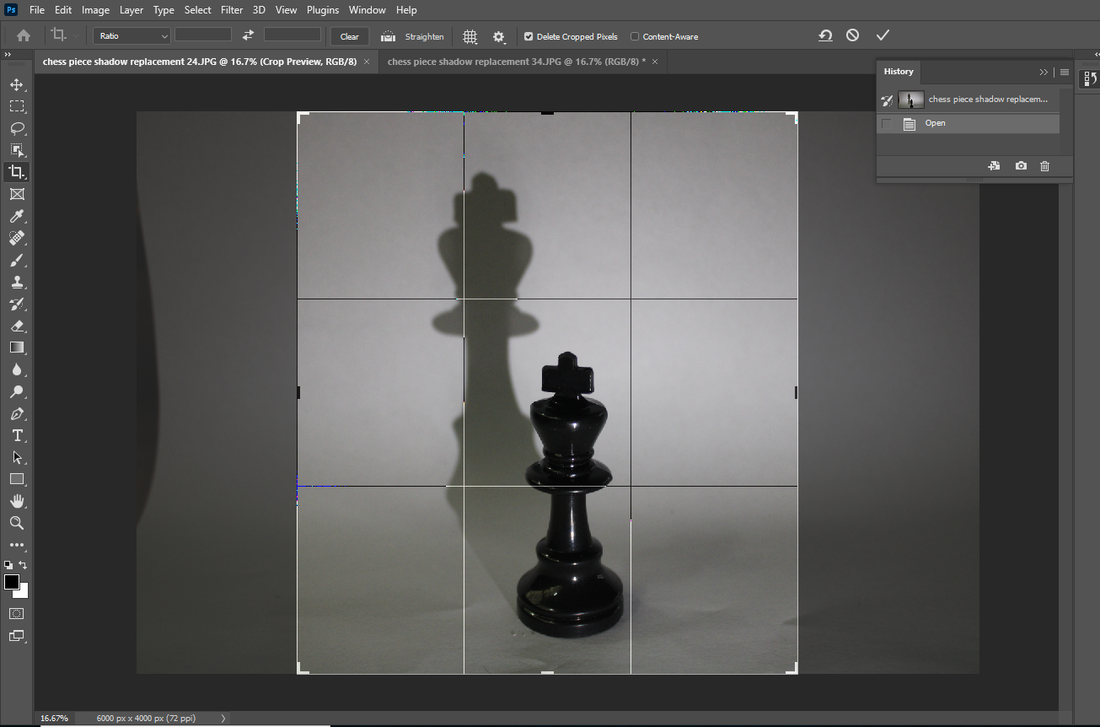
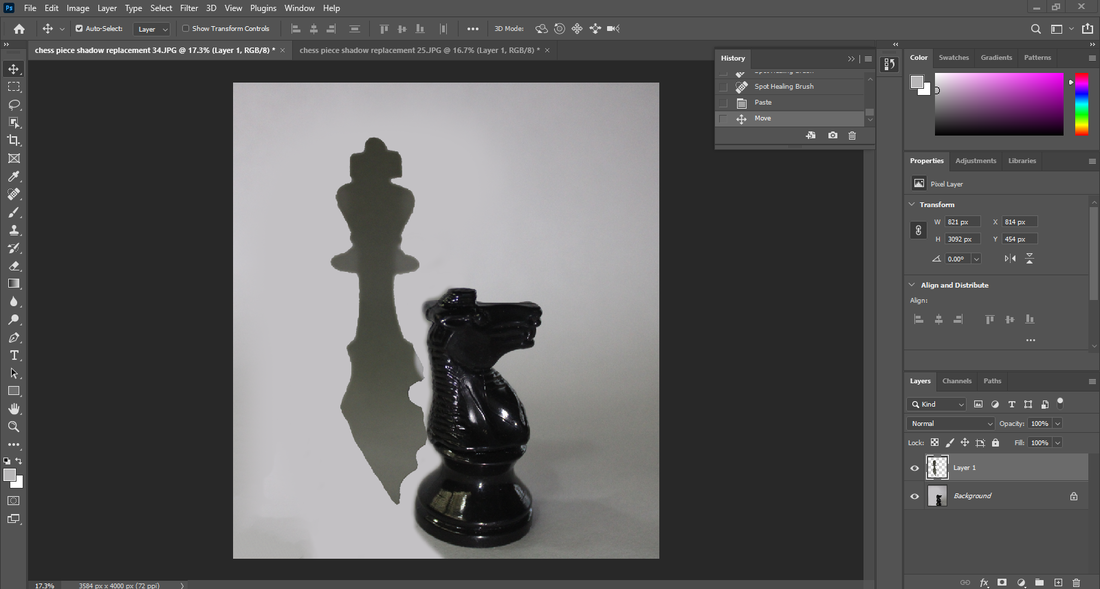
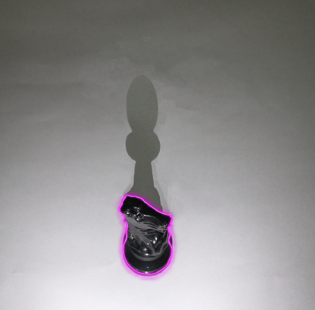
Fist step I did was upload the two Image I was gonna edit and opened them together on the same photoshop. This way it will be much easier to convert stuff over to each other. I had cropped both images to remove the background and so the focus is on the shadow and the chess piece.

Once I had cropped both Images I then decided which images shadow I wanted to change and decided to change the knights shadow. This was a very long and difficult process I had use the eyedropper tool to select the same shade as the background. I then went over the knights shadow using the pain brush and drew over the shadow. It was difficult because I had to make sure the background look natural as the whole background is not all the same shade and if were to try and get it to make it look as normal as possible it would require me to do some blending and let the thousands of shades fade so instead I had made a certain section all one shade on the left. I had to also be cautious to not draw over the knight piece.
|
|
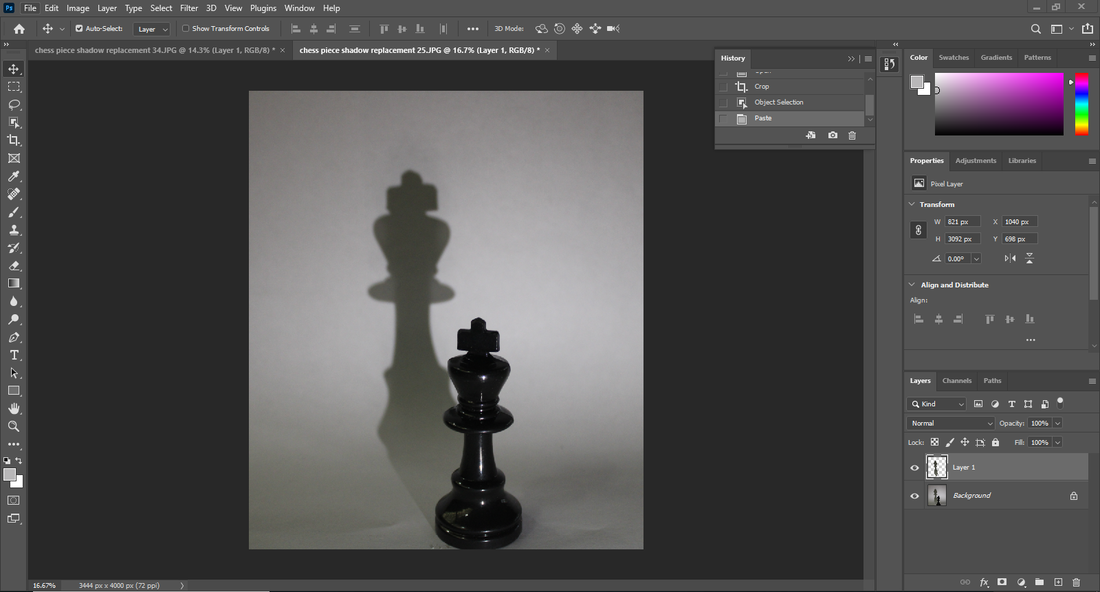
It does not show the selection but the after that I had went to the other image and had used the object selection tool to highlight the shadow. Once it was highlighted I copied and pasted it as a new layer. This would allow me to also copy and paste it onto the other image. Sometimes the shadow fits in naturally but in this case I could not position it to make it look normal which had made thing much more difficult.

Now that that issue has happened I had positioned it no to far away just enough so that it looks realistic enough. Then after that the shadow is not attached to the knight and I tried to use the spot healing brush to connect them but it was much more difficult.
After:


|


|
Outcome 2:
|
|


|

|
Outcome 3:


|

|

|

|
|
|
Outcome 4:
For this next outcome I decided to try and experiment with changing the whole image and using some of my stronger photos I did with a professional photographer to really show that even if the image is very high quality and is hard to edit there is still some edits that can be done and I challenged and pushed my self onto this next step and decide to see what edits I can create.
Steps:


Outcome:

Final Gallery
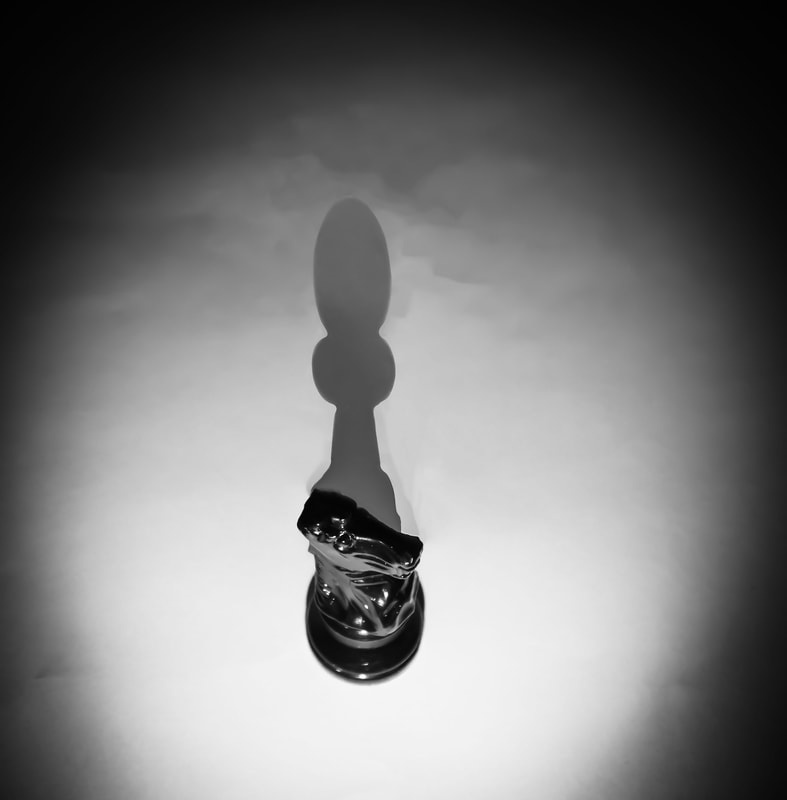
For this section I intend to create some outcomes of chess pieces by replacing their shadows with other chess pieces and attempt with experimenting on the background of these images and maybe turning it black or white or changing the colour of the background and the chess piece and having contrasting colours or warm and then cool colours. These objects will not be shiny so I can no do much with the texture on the chess piece but rather I can change something else maybe find a chess pieces with some texture so I can do some refinement on that. Perhaps also challenging myself with another photo that I could perhaps add or alter a shadow on.

|

|


|


|


|

